Learn how to make your own blown eggs for Easter so you can use them all season for decorating and crafting. This DIY tutorial takes you from egg to ornament with suggestions for decorating and making ornaments. This is an Easter and spring craft for kids and adults alike! 
What is a Blown Egg?
No, this does not mean Easter eggs that are wasted, smashed or ruined. Blown Easter eggs are regular raw poultry (chicken, duck, goose, whatever) eggs that have had their gushy, egg-y insides removed by blowing. Once they’re cleaned out, you can decorate them as you would any other Easter egg.
Blowing out Easter eggs is quite common in Europe; the famed Faberge and Pysanky eggs being two great examples.
Just as a side note, one of our favorite Easter/Passover books has got to be Rechenka’s Eggs, by Patricia Pollaco – just a sweet, sweet book – where hand blown eggs are featured. We just read it today, in fact!
Why Use Blown Eggs for Easter?
Hard boiled eggs are a common choice for egg decorating, but they aren’t the most sanitary, especially if you use them for Easter eggs hunts! By the time you get that hard-boiled egg to eat at the end of the day, its exchanged who knows how many little germ covered hands. It’s probably also been cracked open in who knows how many places in the yard and spent the better part of a sunny afternoon being turned into something less than appetizing.
Ew.
Want to avoid all that – germs, wasted food and possible food poisoning? Great! Follow along with the tutorial for Blown Eggs for Easter.
DIY Blown Eggs for Easter
This really isn’t complicated but the key is to use finesse, not force. Be very gentle with the eggs and watch your little kids closely to help them be successful with blowing eggs. There’s a short tutorial video to help you see the process. After you watch it, read the more detailed instructions. Let me know if you have questions!
How to Blow Eggs for Easter Decoration
Equipment
- Nail with a fine head, or a small metal skewer
- Straw, optional
- Long, sharp pin - like a leather needle
Ingredients
- Clean room temperature eggs - 1 Dozen
- Towels
- Ribbon or Pipe Cleaners
Instructions
- TO BLOW THE EGGS
- Pre-wash eggs and dry.
- Bring your eggs to room temperature to prevent breakage. A warm shell is more flexible than a cold one.
- Holding the egg gently, but firmly use the nail or skewer, make one hole at the pointy end of the egg.
- Again, holding the egg gingerly, make a hole in the other end.
- Slightly enlarge the bottom hole by removing just a bit of extra shell around the opening. This will provide a nice-sized hole for the egg to come through.
- Insert a long pin into the egg and swish it around to break up the yolk for easier blowing. A long sewing needle or skewer will work.
- Use your mouth to blow out the egg. If you prefer, you can use a straw between your mouth and the egg to blow out the egg. Use long, even breaths – do not use big puffs, or you might crack the shell with the pressure.
- Place a bowl underneath your operation to catch the contents of your eggs. Save the mixture and use for breakfast! You can freeze the egg part, which ends up scrambled at bit, to use later or you can make an fresh cheese soufflé!
- TO CLEAN UP AND DECORATE
- Submerge the blown eggs in a sink full of soapy water.
- Tilt the eggs until water fills the inside.
- Wash the inside of the eggs by shaking them back and forth with the water inside.
- Blow out the water when you’re done and place on a towel to dry.
- Color your eggs.
- When dry, you can string your blown eggs with ribbon or pipe cleaners in the shape of hooks – see the articles for details. Hand and enjoy!
Notes
TIPS FOR SUCCESSFUL BLOWN EGGS
There are some things we’ve discovered over the years that make this operation go a little smoother. You're going to break a few eggs and blown eggshells. Don't sweat it; it happens every year. Don’t let very small children blow the eggs. However, they can certainly help wash and blow out the water! Room temperature shells work best – cold shells aren’t flexible enough to withstand the blowing process without cracking or breaking. If you have to use cold shells, go very slowly. Slightly enlarging the bottom hole with help the process go faster, as I mentioned above. When you’re doing a few dozen blown eggs for Easter, faster is better.
Making Blown Eggs into Ornaments
There are various ways you can turn your eggs into ornaments. Here are two ideas:
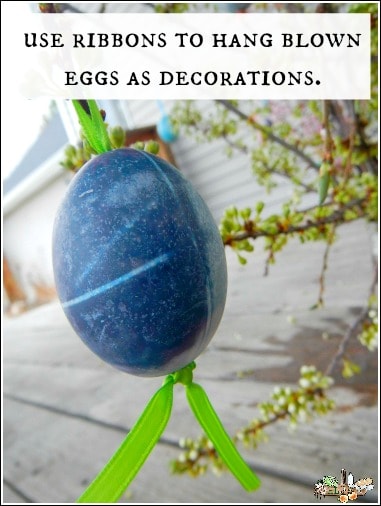
Ribbons
I’ll run you through this ribbon version first since it’s the prettiest. If you’re doing this craft with grown-ups or teenagers, you might enjoy this method. If you have little kids, there’s an easier way below.
-
- To use ribbon for threading the blown eggs for ornaments, use a large darning needle and thread it with a thin ribbon about 12 inches long.
- Pull it through the needle so that each end is six inches long.
- Tie the two ends together with the needle still attached to the ribbon.
- Put the needle through the bottom, larger hole and out the other side.
- Clip just below the needle and tie a knot with the ends.
- There should be an opening large enough to hang the blown eggs on a spring tree or from a hook, but you may also insert an ornament hook onto the ribbon.
- If the hole at the bottom of the eggs is so big that the ribbon’s knot will pass through, tie a bead above the knot before you thread it through the egg to take up the space.
Pipe Cleaners – Easy!
I love the look of ribbons but with five kids, it’s a lot more work! I prefer pipe cleaners which I save and re-use every year.
- Cut a pipe cleaner in half.
- Fold one end 1/4″ over to form a barrier at the bottom of the egg to keep it from pulling through.
- Insert the other end up and through the egg, out the other side.
- Fold the tip over to form a hook.

That’s it, you’re done!
Tips for Successful Blown Eggs
There are some things we’ve discovered over the years that make this operation go a little smoother.
- Don’t let very small children blow the eggs. However, they can certainly help wash and blow out the water!
- Room temperature shells work best – cold shells aren’t flexible enough to withstand the blowing process without cracking or breaking. If you have to use cold shells, go very slowly.
- Slightly enlarging the bottom hole with help the process go faster, as I mentioned above. When you’re doing a few dozen blown eggs for Easter, faster is better.
Decorating Blown Eggs
You can decorate your blown eggs like you would any Easter egg. If you’d like to learn how to replace store-bought Easter egg dyes, see below:
>>>—Click on the link to Learn How to Use Natural Dyes for Easter Eggs—<<<
Here are some other decoration items to think about:
- If you don’t want to mess with dye, you can use stickers, ribbons and glue, henna designs, Sharpie pens or acrylic paint if that’s what your kiddos prefer.
- When you dye your blown eggs, you’ll need to remember that they float. Gently weigh them down (a spoon works fine), or put several into a pint size mason jar and screw on a lid to keep them submerged.
- For more inspiration, visit Imagine Childhood’s subscription service. Meagan will send you Waldorf-inspired poems, craft tutorials and recipes every month! We use these in our family and love them. They’re so beautifully produced. Click below to learn more:
More Resources for a Natural Easter
The following are a few more Easter eggs links that might be helpful to you for decorating.
Natural Easter Fun


Making Felt Easter Eggs

Watercolor Painted Easter Eggs

The Best Method for Making Tea-Dyed Easter Eggs

5 BEST Egg Decorating Ideas Inspired by Nature
Blown Eggs – A Family Tradition
Blown eggs are delicate and not every phase of this process is good for including young children, if you keep them of staff.
BUT, even little ones can be taught to:
- place the eggs carefully into the dye baths
- tie simple knots in the ribbon
- make scrambled eggs with the leftovers
- help you crush shells for the compost pile of the ones that inevitably break despite your best efforts
Stuff breaks. You work hard, you give it your all and stuff still breaks.
Some cracks can be repaired, though. Maybe not the ones that appear on a blown egg, but the ones inside you and I? Yeah, those can be mended. Isn’t that what this time of year is all about?
Maybe that’s why the egg is used as a symbol of renewal and hope in both the Easter and the Passover celebrations that mark the coming and going of this season?
Sometimes its a craft. Sometimes its an object lesson. That’s why I love Nature’s God.


After making the little holes in the ends of the egg, be sure to insert a long craft needle into the center to break the yolk before trying to blow the insides out. Makes a big difference.
Awesome, tip, Karen – thank you!!
Thank you for sharing this excellent tutorial with us at the Hearth and Soul Hop. I’ve pinned it to my Easter Ideas board on Pinterest. Your Blown Eggs look beautiful.