Here’s an old-fashioned game with a modern tutorial to wind up your summer games! Learn to make your own DIY Game of Graces with a few household items and some small pieces of equipment (nothing more complicated that sand paper). Best part, it only take a few minutes to make so you can get out and have fun with your family! 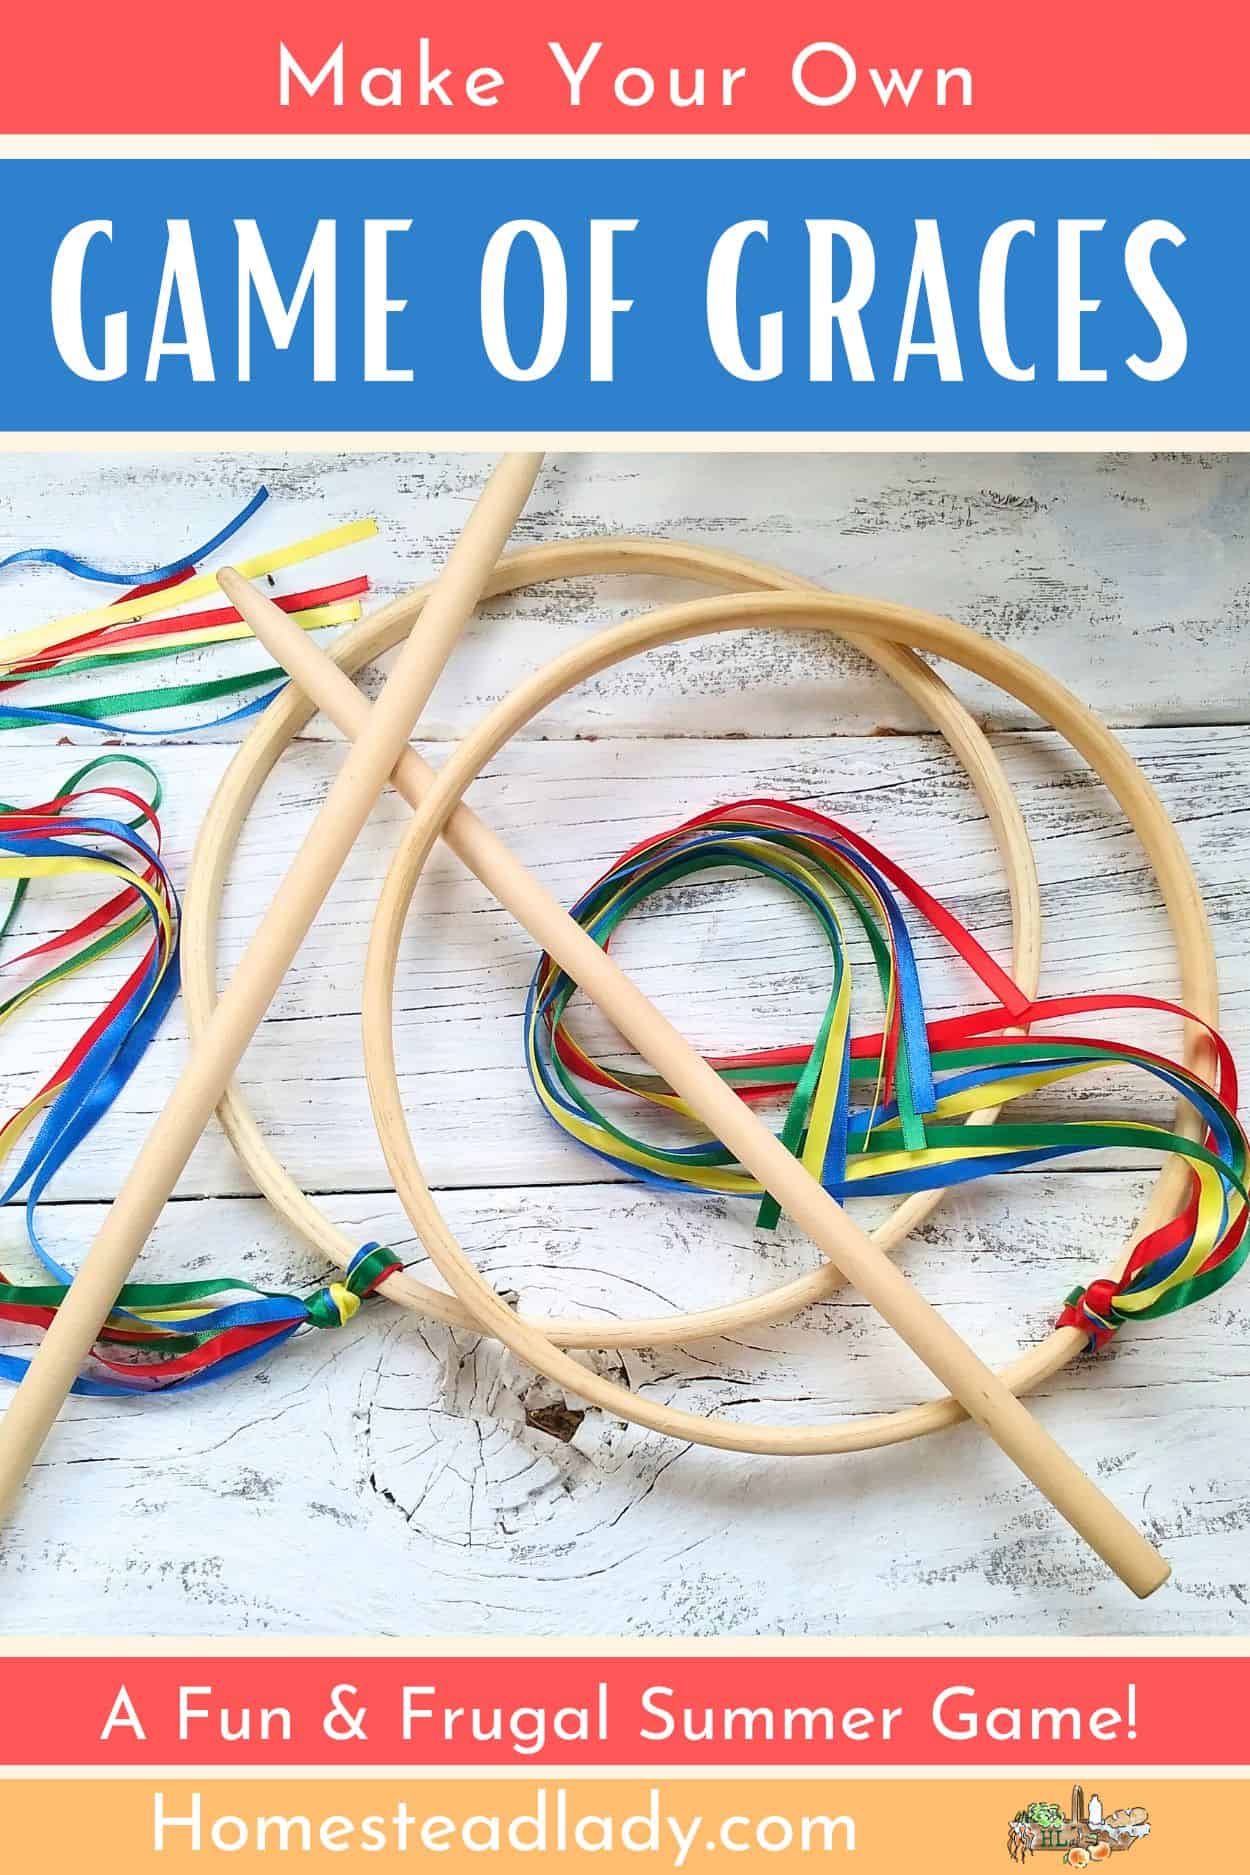
More Links for Summer Fun:
15 Service Project Ideas for Kids
>>This article was originally written for our book, Homestead Holidays.<<<
Where Was the Game of Graces Invented?
The game of Graces was a popular game for girls in the 1800’s. It was first played in France where it was called le jeu des graces.
The Game of Graces was considered not only suitable but proper for a girl to play since the activity attended to it was purported to perfect graceful movement. These days, the game is played by adults, as well as children, and boys, as well as girls.
I never, ever look graceful playing this game but I can report that it is pure fun – even when you fall all over yourself trying to get your hoop.
How Do You Play the Game of Graces?
The object of the game is to catch the wooden hoop that flies through the air from your opponent’s rods onto your own rods. Here’s how the game of Graces is played with two players:
- Each player holds two rods (wooden dowels).
- The player launching the wooden hoop, holds their rods across each other like open scissors.
- While the player catching the hoop holds the rods straight out in front of them, about five inches apart.
- The player launching the hoop, crosses their rods and raises them in the air.
- Pulling the rods down and across and pushing the hoop, the player releases the hoop towards their opponent.
- The opposing player catches the hoop on her rods before it hits the ground.
- The first person to get 10 catches is the winner.
The main appeal of this game is that it’s super simple, no electronics involved. The Game of Graces was one of many economical, easy games that Victorian children would play. The Vintage News has a fun article on Hoop Rolling, which was one of these easy games that also involved a wooden hoop.
Family Rules
When our family plays, we allow for do-over launches if the hoop gets stuck in trees, or on fences or on the neighbor’s dog.
Also, if anyone under eight is playing, we allow a few extra launches if the hoop goes too far awry.
- One other family rule is that you have to inquire if the catcher is alright upon the event of a fall BEFORE you start laughing.
You can purchase kits that come ready made for the Game of Graces but you can also easily make your own.
How Do You Throw a Hoop in the Game of Graces?
Throwing the hoop is the hardest part and the essence of the game. Follow the instructions above and you’ll master it with practice.
Here’s a little tip: The crossing motion of the rods will launch the hoop into the air. However, a slight toss upwards at launch time will help the hoop go farther and higher.
The motion is fluid once you get it down – and you WILL get it!
DIY Game of Graces Tutorial
Here are some simple instructions to make your own 2-player version of the Game of Graces. You will need a small saw, like a limb saw or utility saw. You will also need some sand paper.
This is such a simple game to put together that your children should certainly be encouraged to help! Even younger children can be taught to use sand paper, while the older teens can take care of any cutting.
Let everyone have an opinion on the color of ribbons you choose and whether or not you should paint your hoops and sticks. Have fun!

DIY Game of Graces - Make Your Own!
Make your own Game of Graces with this easy tutorial. Bonus, learn how to play!
Materials
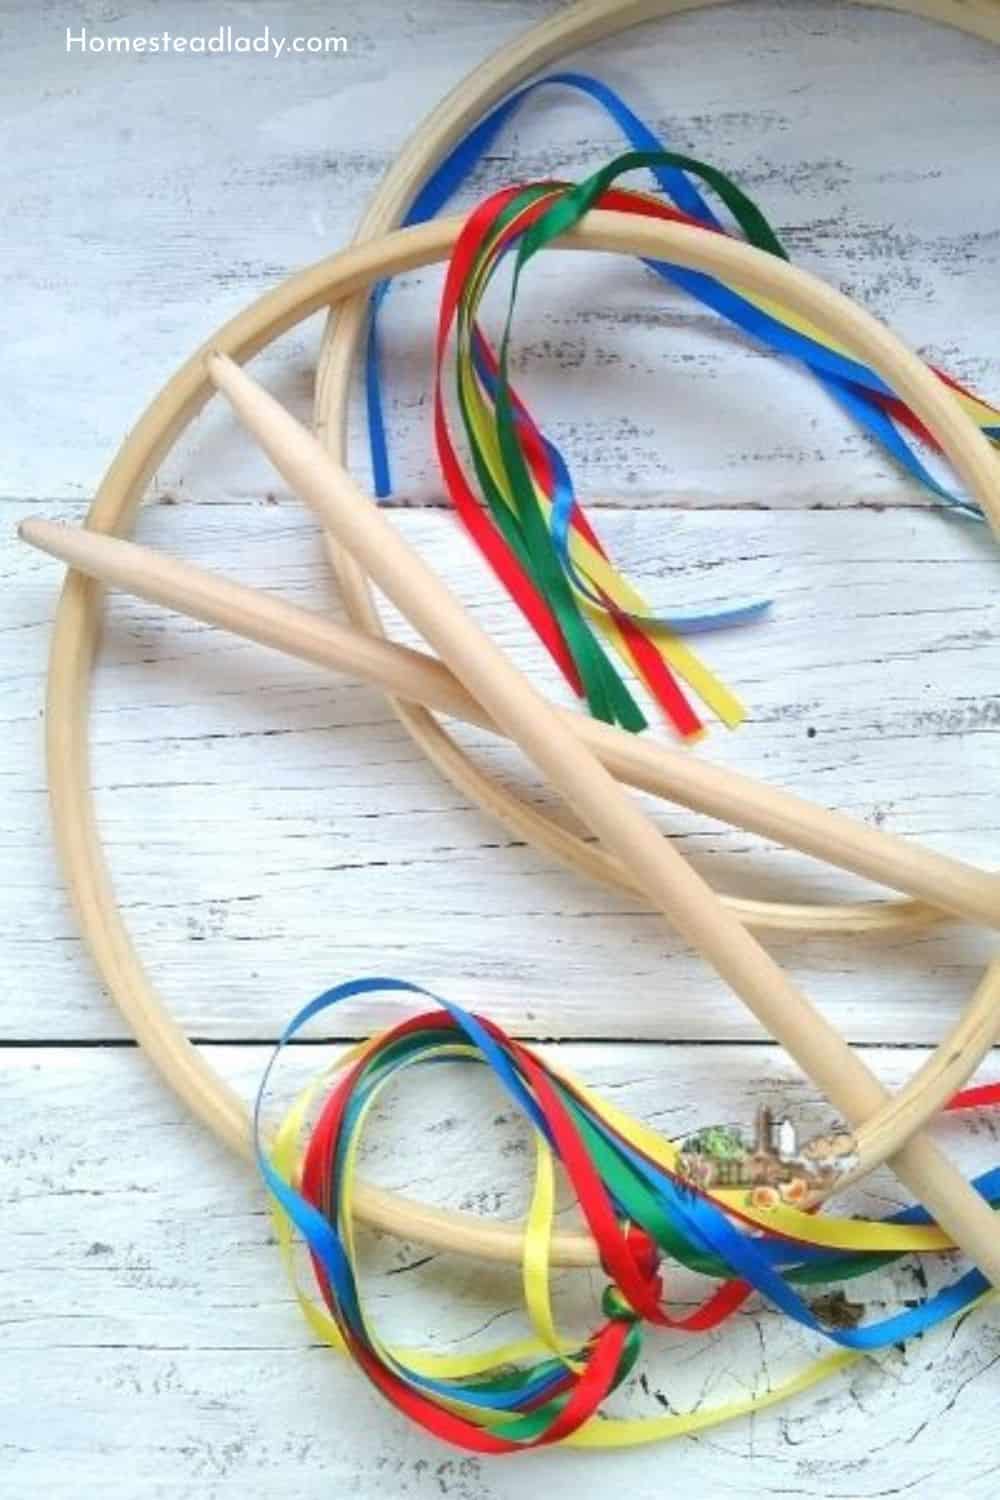
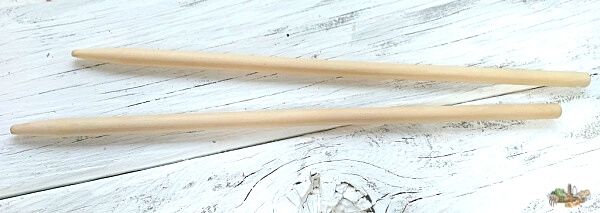
- Four wooden dowels 18-24 inches (45-60 cm) long, with a diameter of 1/2 - 3/4 of an inch (1.27 - 1.9 cm). The dowels should be thick enough not to break upon repeated use but thin enough that they’re not too heavy.
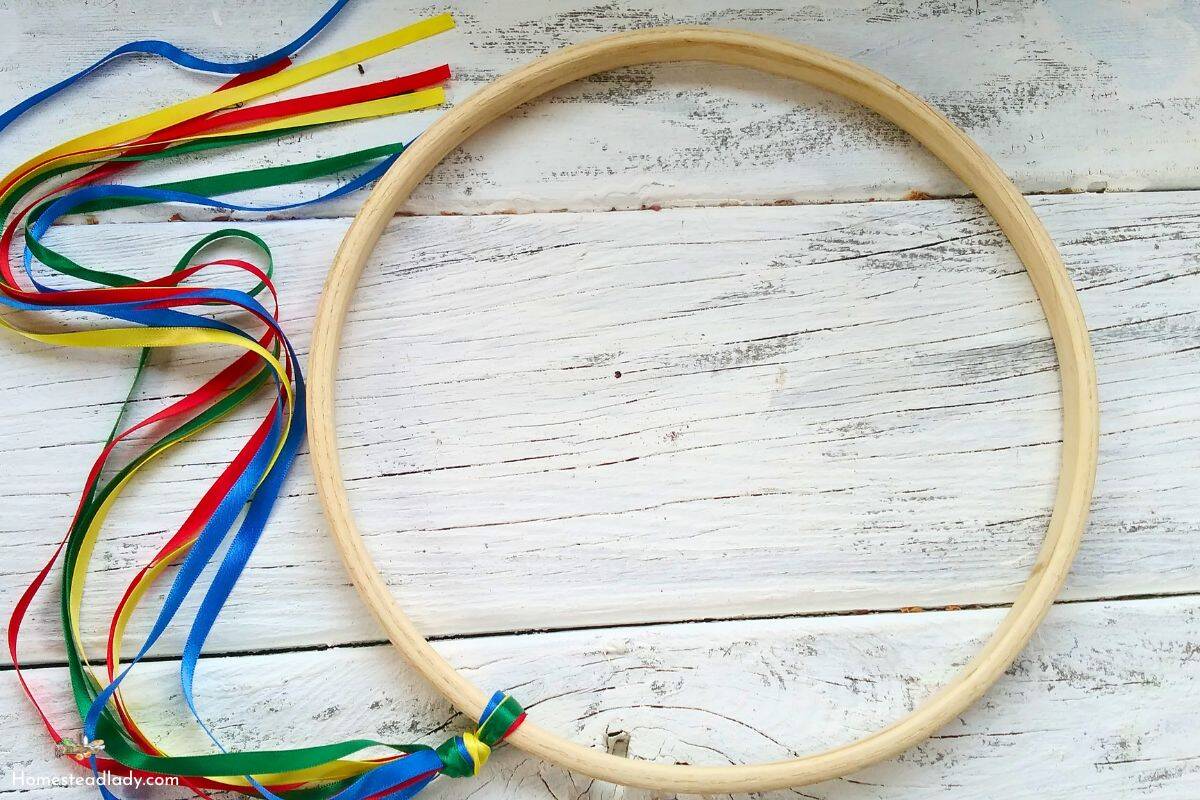
- One wooden embroidery hoop, 6"- 8" diameter
- Sturdy bag
- Ribbons, optional
Tools
- Small hand saw
- Sand paper
Instructions
Cut the wooden dowels to length (if needed) and sand smooth. Be sure that the dowels are free of splinters.*
Take the inside ring from the embroidery hoop for use in the game.
You may decorate the hoop with ribbons, if you’d like. Traditionally, hoops were wound with ribbon and had multi-length tails of ribbon. You can even color coordinate them for special holidays. A decorated hoop makes a pretty picture when flying through the air, but it’s certainly not a requirement to decorate your hoop.

If you do add ribbons, clip the ends on a diagonal, and tie a simple knot at each end to prevent fraying.

Place all components in a sturdy bag that will weather picnics, trips to the beach (always a challenge to play in the wind!) and little kids carrying it around.
Notes
*You may choose to taper one end of each dowel for smoother launching, though this isn’t necessary to play the game.
If you would like to create a smooth point at the end of your dowels, use low grit sandpaper (anything between 36-100) to create the shape.
Afterward, smooth the surface with fine grit sandpaper (anything between 100 to 180). The lower the grit number on the package, the larger the abrasive particles.
This means that they remove more material but create more noticeable scratches. Most woodworking projects require a variety of grit numbers to create the desired finish.
For more seasonal, DIY fun on the homestead, be sure to grab your copy of Homestead Holidays!


This looks like a lot of fun! Thank you!
Fun and easy to make – perfect for summer!
I was REALLY hoping for some video of y’all playing! 😉 I’ve actually seen the game played before, and it actually looks like a lot of fun!
I know, right? I don’t think I’ll be filming me playing any time soon…
What a great game! I think it would be fun to see a video of how to play the game.
Ha, I’m sure it would, but you never will see such a video! I don’t have much dignity left after so many years of kids, but I don’t think I want to broadcast just how clumsy I can be. 🙂
Since I am a major klutz (I throw my back out tripping on a goat), I’m going to have the kiddos play it!
Bwahaha! That’s totally fair – they’ll love it.
I can’t wait to try to play this when my family is all home! This looks like it would be fun for all ages!
It is SUPER fun – I hope you enjoy it!
What size hoop would you recommend? We just played this today at Greenfield Village, the kids all loved it and so did I! It seemed to be about 10” to me? Thanks!
So glad you asked that, Madi, because it alerted me to the fact that I neglected to include that in the tutorial. If you’re playing with younger kids, 6″-“8 is a good size. You could certainly go larger, especially for older kids. The one advantage of a larger hoop is that you have more area to aim for – smaller hoops are easier to miss. However, larger hoops can be harder to control as you catch them because they go shooting down your arm!
Really, it’s a personal choice. We have all our sets all mixed up together so it’s a crapshoot what you’re going to get when you reach into the bag. Regardless, it’s always fun!
Hi! Thank you for posting this! We got to try the game of graces at an historical event recently and I wanted to try to make my own set. My conundrum is with the hoop part. I’d like the set to be wooden like the ones we tried out. However, when I look up wooden embroidery hoops online, it appears that all of the hoops have a flat edge on the inside and outside instead of being completely rounded. It doesn’t seem like the hoops would fly off of a flat-edged hoop as well as a rounded hoop with no edges. I can’t tell if the hoops in your picture are rounded or flat-edged, but do you know where I can find rounded, wooden embroidery hoops?
Thank again!
So glad you stopped by, Letty! The easiest thing to do is to use some fine sandpaper to round your edges if the flat edge doesn’t give you the lift you’d like. Most modern wooden embroidery hoops are cheap and that will mean flat edges. The plastic ones will sometimes have rounded edges, but I’d always rather use wood.
I will say that I’ve flat edges hoops just fine, but rounded would be a smoother lift off, you’re right. Hope that helps, have fun!
We made one!! My daughter is going to be so excited!!! Thanks for the tutorial!!!
That makes me sooooooo happy, Janelle! We love this simple game – so much laughter!