Is FREE cheap enough for a garden fence? Learn how to make this cheap garden fence using one of the oldest fencing methods on earth: wattle. If you’ve pruned the fruit trees, tidied up a willow patch, or otherwise come into a mess load of supple branches, this is your weekend to build that cheap garden fence you’ve needed for ages!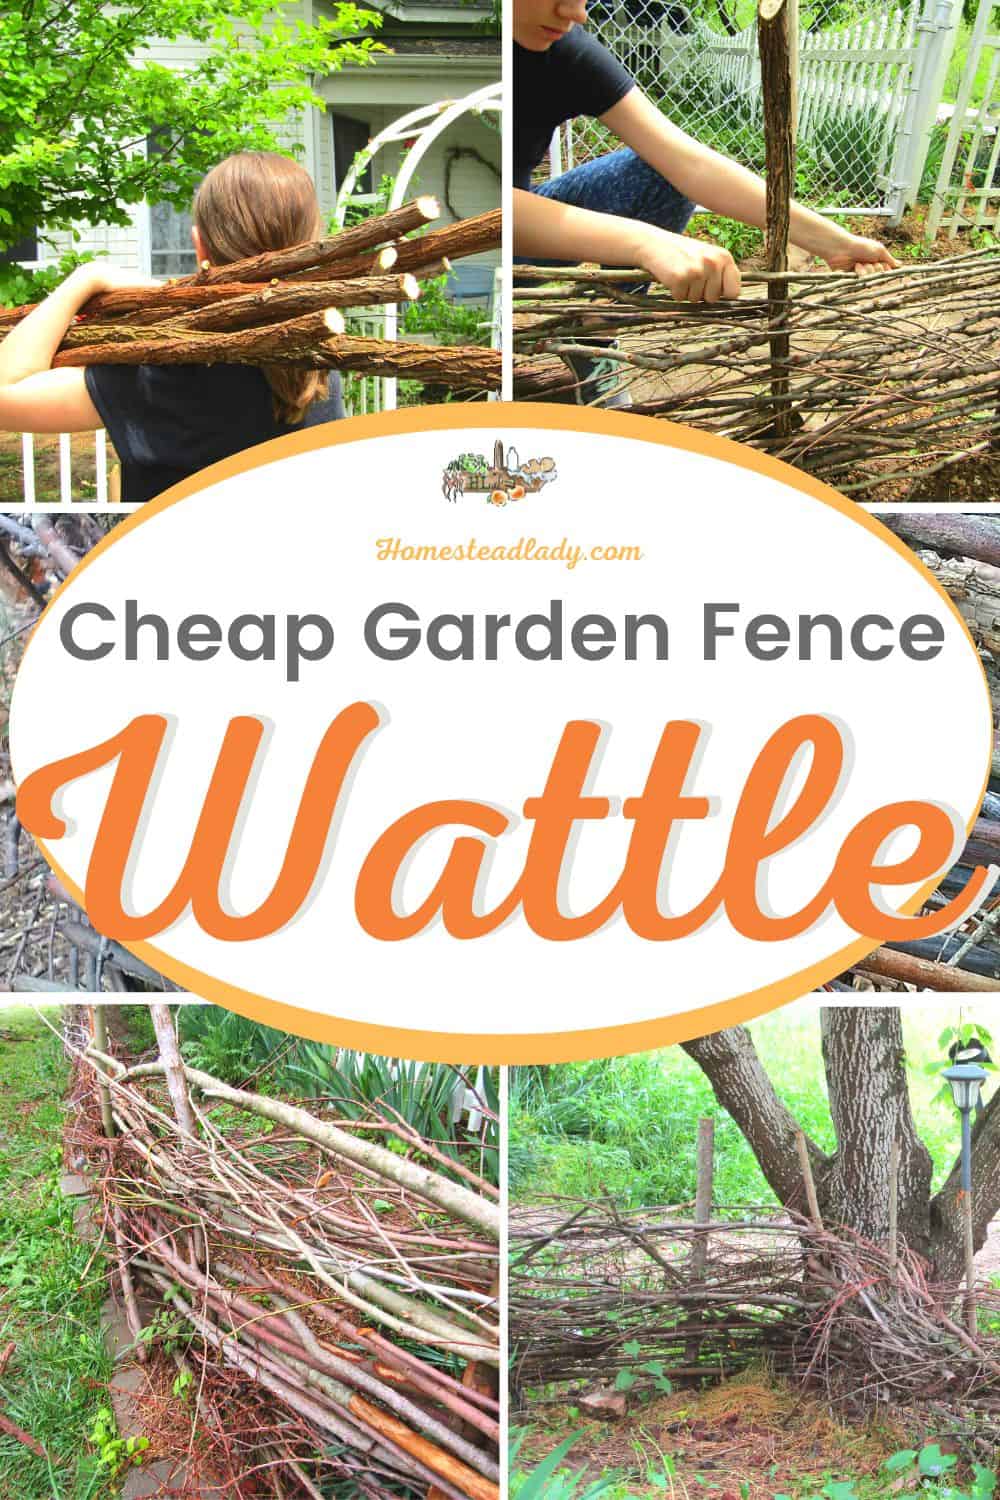
What is Wattle?
Noun (1) Pronounced: wat·tle | \ ˈwä-tᵊl \
1a: a fabrication of poles interwoven with slender branches, withes, or reeds and used especially formerly in building.
b: material for such construction.
In short, wattle is fencing made of sticks – really sturdy ones.
The best part about this cheap garden fence is that it can be made from materials you may already have lying around your land. Or, you can forage for the wood you need. Nothing is cheaper than FREE!!
Another neat thing about this project is that it goes up quickly (compared to conventional fencing) and is easy to learn to do. Even the kids can help with this one! Actually, children are just the right height to find the best weave. Their hands are also small enough to reach through cracks and pull ends tight.
How to Build Wattle for a Cheap Garden Fence
There are several steps to this process, so I’ll break them up into sections. Don’t let the number of steps overwhelm you, though. Building a wattle fence is very simple. Otherwise, I wouldn’t be able to do it.
Let me just offer a little caveat, too. I’m a messy, spastic gardener. I love cottage gardens full of flowers, vines traipsing all over the yard, thyme in the walkways and no two spaces the same. My wattle building reflects my unrefined gardening nature.
Most wattle designs are sleek and sturdy, built for strength and endurance. Each piece of wood used has been neatly trimmed and is of a uniform length and width. I love the look that other wattle builders achieve!
But my wattle isn’t like that, as you’ll see. Remember, this is your project and you can do it however you want. Keep it sleek and trimmed, or rugged and spastic. Either way, it’s going to look wonderful!
If you’d like a printable tutorial of this process, feel free to grab that below.
Cutting the Branches
Be sure to follow good foraging rules, especially if you’re on someone else’s land. Regardless of where you are, the plants will appreciate you not being greedy with what they provide. Never harvest more than 1/4 to 1/3 of the serviceable branches.
The plant needs to be able to rejuvenate and regrow. If you take too much from it, you can cripple it’s ability to recover. Having said that, however, most of these woods appreciate a good pruning now and then. It will actually help them grow stronger, straighter and better. In fact, a healthy willow is SO vigorous, it may not even notice you’ve taken anything at all!
- Ideally, you want to find the longest, straightest branches available.
- Using sharp saws, loppers or hand shears make clean, 45 degree-angle cuts.
- A hand saw should be used on anything over 1 1/2 inches.
- Loppers should be used on anything up to 1 1/2 inches.
- Shears should be used on anything 1/4 inch to 1/2 inch.
- Pile all your cut wood facing the same direction for easier sorting later.
How Much to Cut?
Cut 5x as much as you think you should. Seriously. You’ll never have enough! One of the fence panels in these pictures took a little over one truck bed full of branches.
Some you’ll use; some will be waste. As you sort the branches, you’ll be able to discern the useful parts from the others. That’s why sorting is an important next step.
Sorting the Branches
You’ll want to sort your branches by their usefulness.
- Find the straightest branches you can – these should be your pickets. The pickets are the part of the fence that drive into the ground and form a frame for the branches to be weaved upon. Pickets are what keep your wattle fence upright and strong. For a simple garden gate or small fence, a 1 inch diameter picket should be enough.
- When building a larger, sturdier garden fence, you can use limbs up to three or four inches, as long as you can dig a hole big enough.
- If you want a traditionally clean, smooth finish to your wattle fence, clip off all side shoots and branches from your selected pieces. Traditional wattle uses one branch with no offshoots per weave. I prefer to move as fast as I can with the limited time and resources I have and just get the job done as well as I’m able. Hence, you will see from my photos that I use pretty much every size branch I find. I also allow my main branches to keep their side-shoots as long as their sturdy and unbroken.
- Consider that you might be able to cut branches into useful sections. For example, the lower half of a branch will be thicker and could be used as a picket. If it’s too long, top it off and use the thinner, bendable part as you weave.

You’ll want piles for pickets, weavers and pieces that don’t appear useful right now. You may find a use for those leftover bits – remember those baskets we talked about weaving?
Or, you may need to make some frost or sun protection for your garden plants with the smaller willow sticks. Learn how to do that here.
Put in the Garden Fence Posts
You’ll need some way to drive your pickets into the ground. We use a simple t-post driver.
Driving the pickets into the ground will take a lot less time than digging a hole for each. However, if you don’t have a driver, you can certainly use a post hole digger or a slim trenching shovel.
Tips for Putting in the Pickets:
- The best time to drive your pickets is after a rain. In fact, the best time to do this project is probably spring or fall, depending on the weather in your region. Especially if you want your willow pickets to sprout, plan to drive your pickets when it’s damp.
- We’ll use the project fence highlighted in my pictures as an example, but you can tailor these instructions to your needs.
- Using the straightest branches, cut each picket 4-6 feet long. If you’re trying to keep a small dog out of the garden, a 4 foot picket driven into the ground one foot should be sufficient. If the dog is bigger, or a good leaper, you may need pickets longer than 6 feet.
- Place your first picket end-down on the ground and twist it into the earth just with your hand strength. You just need it to stand up on it’s own and submerge into the earth in a straight line. This picket should be very strong and go in very straight. Both the first and last picket of any line of wattle garden fence will be under a great deal of pressure as the end points of the weaving.
- Place the driver over the upright end and carefully but firmly drive it into the ground until you’ve submerged it at least 1 foot. Any more shallow and the picket may not stand up to the stress and pressure of having the wattle built onto it.

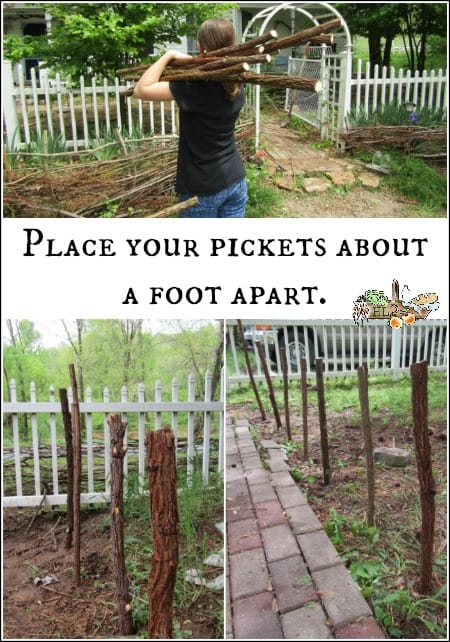
Placement of Pickets
For the project pictured in this article, we used 12-18 inches between each picket. If you know that your garden fence will be under a lot of pressure, you may decide to put in more pickets, closer together.
Consider the activities that usually take place where your garden fence will go.
- Do kids play nearby? With soccer balls that might bang against your fence?
- Are there animals you’re trying to keep out? Or in? (You could easily build a chick brooder out of wattle, for example.)
- Do you need to hang lanterns on your garden fence?
Answers to these questions will help you determine how many pickets you want to place for strength. They will also help you determine how much weave you will need in your fence. Do you need it really condensed and tightly woven? Or, can it be a more open, decorative garden fence.
Either way, make sure that the first pickets on each end are very strong and straight.
Begin to Weave the Wattle Garden Fence
Once your pickets are all in place, it’s time to start weaving the straight, supple branches in to create your garden fence.
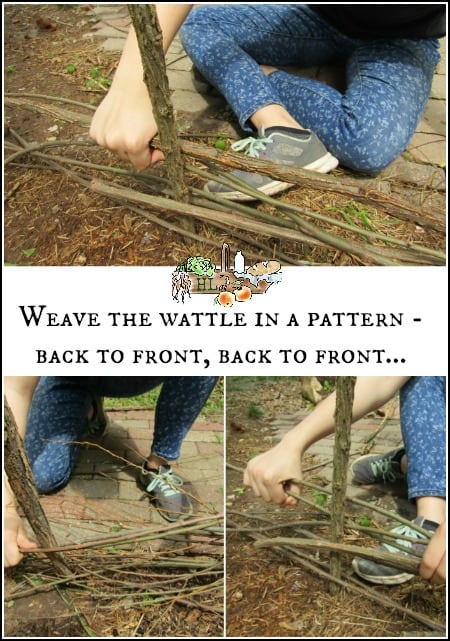
- Starting at the bottom, near the ground, place your first weaving branch. You do this by placing its end behind one picket and in front of the next. Over and over, in this pattern. Behind one picket, in front of the next. Behind, in front, behind, in front.
- Do this until you’ve run the length of your branch.
- Be sure to check your ends at the first and last picket to make sure you’re not jutting into a walking space. If, upon completion, you discover you’ve extended a weaver into a pathway, you can trim it off later.
- Select the next branch and begin again, about a foot of length on top of where the last weaver ended. You start the new branch just over the last branch to secure that last branch a bit. Weave behind and in front again.
- Remember, each time you place a new weaving branch, you MUST follow the pattern of behind-in-front-behind-in-front. This pattern is what provides strength for your garden fence.
- Tuck ends when and where you can. Sometimes it works better to tuck an end after a few more weavers have been worked in on top of it. You can lift and re-position ends as much as you need. Don’t be afraid to move and tweak your branches. This is your fence; be the boss.
- Every 2 or 3 branches, pause to tamp down the weaving. Using your hands, simply push down the sections of weaving until they’re compact. Use finesse, not force – you don’t want to hurt yourself or your forming fence.
- You don’t need to do step 6 if you want an open weave. If your fence is mostly decorative, you may want open spaces between weavers. FYI, an open weave fence may not last quite as long because of breakage.

Straight or Curvy?
I have said that straight branches are best, but what I really mean is that they’re easiest to use. You CAN use branches that aren’t perfectly straight and have a lovely result.
If you’re doing this project with the kids, maybe hold back the wobbly, weird branches for yourself. This will enable you to determine where you’d like them placed and how best to work them into the weave. Little hands will enjoy more success with straight weavers.
Wattle Garden Fence Troubleshooting and Tips
Sometimes things will go wonky and you need to re-adjust weavers. You may even break one! No worries, just keep weaving – behind and in front, behind and in front. If you discover a branch just isn’t working, pull it out.
Remember, if you’re using willow and it dries out a bit, submerge it in water and let it soak overnight.
Thin Branches
If you have some thinner branches that are nice enough to use but you want to make them thicker, braid them together.
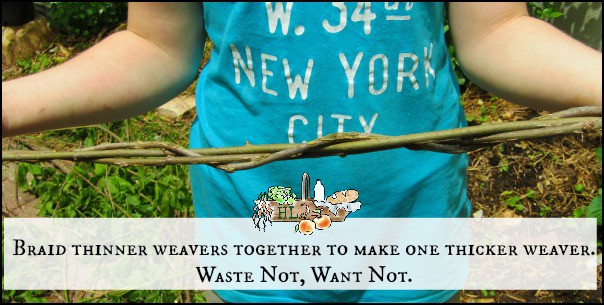
It gets tedious to weave and weave and weave. Weaving one thin branch takes as long as weaving a collection of thin branches braided together to make a thicker weaver.
Break a Picket?
If you break a picket, see if you can insert a new one along side it before you pull out the pieces. Keep the bottom section in the ground, if you can. This will help you have good success shoving a new picket down right next to it. If you can’t get a new one inside the same space:
- Place a new picket directly behind the section of fence where the broken picket is lodged.
- Drive the new picket deeply and make sure it’s straight and strong.
- Using your most supple branches, simply weave from the bottom up connecting your existing fence with this new picket. The connecting weaver branches will need to be small and thin so that they can bend enough.
- You’re essentially wrapping up the new picket like a woman in a corset. Go around and around as tightly as you can. You can lash the new section with cording while the weavers dry in place and shrink, if you want to shore it up.
To Finish the Wattle Garden Fence
- You can continue weaving right up to the top of your pickets. Be sure to firm down the weaving so that it’s secure and tight inside the pickets.
- I like the look of fruit wood, especially apple and plum, so I used my orchard prunings for the top of this fence so that they were visible. The leaves are still on in this picture, but it’s customary to strip the weavers so they’re bare.
- I leave a little bit of space at the top of my wattle garden fence and refrain from weaving to the top. I like to let the fence settle and dry for awhile. Then, I examine the fence and see if any holes have appeared. If everything looks good, I’ll trim the pickets so they’re an even height.
Creating a New or Movable Section
If I need to add more weavers, I tuck them in here and there. Sometimes I’ll add a whole new panel somewhere. For example, I realized I made one side of my garden fence much shorter than I meant to. I didn’t compensate for a dip in the ground where it was built.
Since my dog can get over the lower section, I’ll create another, taller section behind the shorter one. It should take me a few hours is all. A gentleman on YouTube named Clive Smith in the UK can teach you how to make movable sections of fence. These can be used to shore up weak places or as garden gates.
Incidentally, most of what you’ll find on wattle fencing if you do online research will be from the UK. The accents are fun AND they know what they’re talking about. Wattle is in their blood, so to speak. Their serf ancestors were using wattle in the days of the Norman kings.
Needless to say, the wattle technique for cheap garden fences has stood the test of time. We hope you enjoy yours!
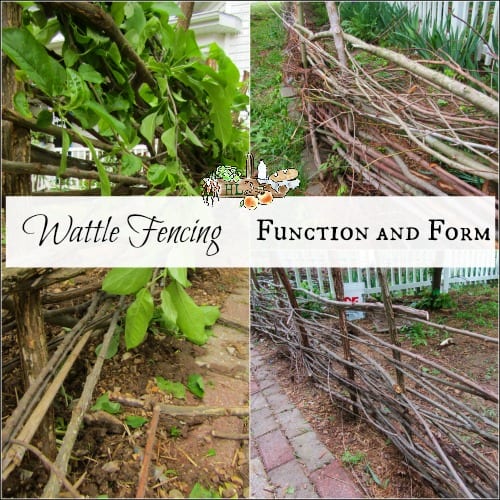
Aesthetics
I’m particularly fond of the look of wattle garden fence. The wood, the weave and the structure of wattle are all appealing to me.
Just as a decorative note, this wattle garden fence looks really beautiful at night with lantern light on it. Because of the tight pockets in the weave, inserting solar lanterns or any yard decoration that isn’t too heavy can create a lovely look. Christmas lights look cozy and inviting on your wattle garden fence, too.

I appreciate it when something is both functional and beautiful.
Wattle Wood for a Cheap Garden Fence
Not all wood is created equal when it comes to wattle fencing. You want a wood that will stand up to age and weather without becoming too brittle. If you only need your cheap garden fence to stand up for the growing season, you can pretty much use whatever you want. Once you’re done with the temporary fencing, dismantle it and toss it into your hugelkultur beds. To learn about building a hugelkultur garden, please visit this link from Joybilee Farm.
However, if you’d like the fence to last more than a season, try to find any of these woods:
Willow
This is my favorite wood to use because I can forage it where I live. It’s also strong enough to hold up to my climate. Willow is also appealing because even if it dries out, you can simply soak it in water for 24 hours and it will regain elasticity.
You can see how we did just that in this article about basket weaving – click here.
Another fun thing about willow is that it will often root, sprout and grow. The willow will sprout from the pickets placed into the dirt, if they happen to still be alive when you make your fence. Here’s a picture of a wattle fence post we put in the ground about a month ago. See the leaves that have sprouted?

A community garden I volunteered at had a living arch of willow that they’d designed entirely on accident. That is, they thought the willow was completely dead but after a year of the arch being in place, they noticed it had sprouted leaves in spots. Now they have to prune their very much alive willow arch every year.
Hazel or Other Nut Wood
Hazel has been used for coppice wood for centuries in England. It’s strong, durable and, when cut young, supple enough to bend and form. Hazel also happens to be a favorite plant of permaculturalists because of how diversely useful it is in the garden. Permaculture.co has a great article extolling the virtues of hazel here.
One of my idle dreams is to set up a coppice wood forest on my property so I always have trellis and wattle wood available.
Hardwoods
Any hardwood like oak or sycamore, both of which can be foraged in many areas, will also work. The harder the wood, the longer it will last. However, it will also be more difficult to use the more mature it gets. Try to harvest young, supple branches that will be easier to bend.
Fruit Trees
Some of my favorite wattle wood comes from fruit trees. If you have fruit trees to prune every spring, don’t waste them in the wood chipper! Use them to make wattle for not only a cheap garden fence, but also a beautiful one. Fruit wood is durable and supple.
Plum or cherry wood has a deep color that is just so lovely to see in a wattle fence. Part of the appeal of these fences, apart from their frugality, is their beauty. Beauty is not an afterthought in the garden! Beauty is a large part of why we garden at all.
Apple and pear wood is also lovely in their silvery, winnowy way.


This is such a great idea! I’ve never seen this type of fence before.
I’ve always wanted a wattle fence!! I didn’t even think about using fruit tree wood! What a great idea! I love how your willow one sprouted though! They are so charming! ♥️
Great directions! I think fences like this are cute and I will definitely use this post if we make a fence like this!
Gorgeous! I freaking love that it can sprout and become a living fence. How cool is that!
Isn’t that so neat? It means that it can be a permanent fence for zero dollars, if you’re willing to put in a little bit of time and effort.
This is such a great idea! I am going to give it a try this summer
So pleased you found it helpful, Anne! Good luck building your own and let me know if you need any help. I mean, the online kind – unless you happen to live near me! 🙂
I love it, for me, it doesn’t look cheap. It’s creative and nicely blend with nature.
Thanks, Vladka! Do you mean you wouldn’t be able to produce this fence cheaply? Do you live in a city? If so, if your city has a green waste site, you might be able to salvage branches there. If not, it would be tricky to produce this fence for sure!
Thanks for stopping by!
Suspect she means that it doesn’t betray its thrifty nature in how it looks, like it looks nice and expensive and custom and creative and good. Which is all true! Almost too good to be so! Wattle fencing is great and you’ve got a good guide up here. 👌
Thank you for your kind word, Maria, and I think your correct that Vladka meant they don’t look cheap! 🙂
THANK YOU for sharing this idea! I stumbled on your website on Pinterest and I knew there was a reason why I was saving my apple wood. Just started building a garden on the side of my home and need a fence for the entrance to prevent our curious labradoodle from getting in. Happy Spring!!
So glad it was helpful, Valerie! Yes, always save apple wood, I say – it’s bound to be useful for something. Dogs can be such a nuisance in the garden, can’t they. Our Great Pyr has sixteen acres he could dig in but he wants to dig in my herb beds. We actually put hot wire on our wattle fence this year to train him out of the habit of getting in there. Pyrs can be SO super stubborn!
I hope you have great fun with your wattle and enjoy how it looks!
I have been scouring the internet trying to find a place that sells willow or hazel branches without any luck. Is there someplace to purchase them from?
I’m sorry, I know that’s frustrating! Sadly, the only purveyors of wattle wood that I’ve found are based mostly in the UK where people still frequently use wattle. If you’re in the US, like I am, you’ll be hard pressed to find a source.
Foraging is the cheapest option, of course – I’m guessing that’s not an option for you? Try to think of materials that are similar but more available near you. Have you tried looking for bamboo bundles? What about other materials like Halyard rope for ship rigging? Of course, the cost increases might not be palatable to you.
You could try pounding in wickets tighter together and packing them full of straw – sort of like a wall. You could even add some mud for something adobe, though it wouldn’t be permanent. If you think of how nature builds a dam, it might help you get creative if you need to change the process to make it suit what you have available.
If you need to abandon the idea of wattle, you can use a sawsall to cut pallets in half to create garden bed forms. They can be kept upright with t-posts. You’ll want a t-post pounder AND puller (in case you need to move them) and a good pair of ear plugs.
I hope that helped even a little?
Living Willow Farm has them in the US, also Vermont Willow nursery
Thank your for that great tip!
I am also looking for pliable materials to make my own sections. After reading all the comments above I see that there are no suppliers of materials in the us,,,is that still your thought? I am wondering if approaching some local orchards if they could be a source. I don;t know how or when they prune if that would be a source of the weavers. Hard to believe there is no one in this country that grows and sells hazel , as that is the look that I prefer. Any advice?
I haven’t been able to find any here in the US but I only looked briefly, and probably wouldn’t purchase any because I’m a skinflint! 🙂 Approaching orchards is a wonderful idea and I think you should try that. Call now and find out what their pruning schedule is – depending on your local climate, they could be doing it now. Fruit wood is wonderfully strong and pliant.
If you’d like to use it for the pickets, too, just ask for some branches 2-4 inches in diameter and cut them to the length you need. If you use a compound miter saw, or something similar to cut diagonal angles at one end to form a point, you can drive it into the ground. They’re especially handy at corners because they’re strong.
I plan to actually grow my own coppice wood, though it will be a completely new project for me. I just ordered the book, Coppicing and Coppice Crafts by Rebecca Oaks to learn more about it. Too bad we don’t have some Limey relative we could visit in England so they could teach us the native ins and outs, right? I do love the look of hazel and actually like to have it growing anyway, so it should be an easy step to just create a coppice section of the orchard. Here’s hoping it works!
A perfect fit for my project to make a magical fairy garden for my granddaughters. I have a lovely maple tree with a carpet of moss beneath.
I plan to make a little pool for small boats, and perhaps a fairy house and some shade loving plants. Not sure what else. I wanted a little low fence , just high enough that a small child, upon sitting down, feels hidden, but Nana can keep a watchful eye from her garden. Going to try using sweet gum ball trees for uprights and forsythia for weaving, because that is what I have. Thank you for these directions.
That sounds wonderfully delightful! Let me know how the sweet gum works, if you think about it next season. And let me know if you have any questions as you go – I’m happy to help, if I can.
I think you’ll be on the short list for coolest grandma ever!!
I am also curious to know how the sweet gum and forsythia worked, as this is also available to me. We have a lot of river cane available, too.
By “worked” do you mean they have rooted and are growing? Good question! You’ll know they have rooted because leaves and small branches will begin to appear. They’re require consistent watering to stay alive and some have sensitivity to extreme heat. These rooted sticks are like baby trees. They don’t always survive, but when they do, it can be really useful!
By “river cane” do you mean sandbar willow? Or something else?
?? When I first opened his article, I saw a “Series of Cheat Sheets” that could be downloaded with printed instructions to build a wattle fence. It took me to another article and then DISAPPEARED!! Are they still available ?? Love to see them.
They sure are! You can access the sheets with the newsletter sign up box under the section of the article “HOW TO BUILD WATTLE FOR A CHEAP GARDEN FENCE”. When you put your name and email into the box, it will immediately redirect you to the PDF with the tutorial.
Your browser might immediately download it and then you can click on your download prompt in your browser. Or your browser will immediately open the PDF. I’m not a techie but I’m pretty sure that your browser/download settings will determine which of those two things happens.
If you still aren’t able to see the PDF, ALL the free downloads you have access to are in the member newsletter library, including the wattle tutorial. Each email newsletter you get in your inbox has all the newsletter login information at the bottom of the email. If you think maybe you weren’t able to sign up for the newsletter, here’s that link.
I’m not sure if you clicked on another link in the article and were taken to a different article, or if you were taken to a new window to download the PDF for the wattle tutorial. Either way, I hope that information was helpful. If you’re still having problems, just let me know and I’ll try again!
Lol…did Not find the Wattle Cheats in the Newsletter Library. I have already signed up once, and get emails from you. I tried to “sign up” again,…from your link, no sign up box in the article above, and confirmed my email addr…but nothing has come thru. Oh well…
I’m sorry you’re having a problem, thank you for alerting me. It sounds like you need to access the wattle fence instructions. I’ll email those to you right away so you can have them in your inbox. Have a lovely day!
Fence & Deck Connection here — what a fantastic wattle fence tutorial! It blends rustic charm with practicality beautifully. Your tips on selecting pickets and weaving are super helpful, especially for beginners. And using fruit tree wood? Love it. Can’t wait to try this project in my own backyard!