Create this winter plant protection cage from natural materials at no cost using twigs and branches. Protect herbs and tender perennials with an ancient garden technique!
Do You Need Winter Plant Protection?
If you live where winter temperatures dip below zero for consistent days or weeks, winter plant protection can be beneficial for borderline winter hardy plants like herbs and flowering perennials. Sage, for example, is supposed to be able to survive my Missouri winters, but some years it suffers in the prolonged cold.
Also, our weather yo-yo’s between freeze and thaw in the spring which can be deadly to semi-woody and woody plants like herbs. An extra thermal layer of some light, organic material can really help prevent permanent damage to these beloved plants like my sage.
If you live in a moderate growing zone where winter temperatures don’t ever dip below zero, this kind of winter plant protection probably won’t be necessary. Still, you may consider this DIY plant protection for your less hardy plants to help them move in to spring stronger and healthier.
Build your DIY Winter Plant Protection
If you’ve read our DIY Wattle Garden Fence article, then you’ll already know the basic assembly for this winter plant protection. Namely:
- Stakes (or pickets) driven into the ground.
- Long branches woven in and out of the stakes to create shape.
Today, you’ll be forming a simple t-pee of protection for your plants to overwinter beneath.
The T-Pee of Protection
When used to create a lightly woven t-pee around tender perennials for overwintering, the structure provides just enough protection from wind while insulating the plant with leaves and straw.
We’ve built lots of willow structures before. We have a fun post on how we made the willow house in our children’s garden – just click here to read it. That playhouse was an epic build and took awhile to complete.
Willow and other branch structures are simple, free, and fun!
Step one
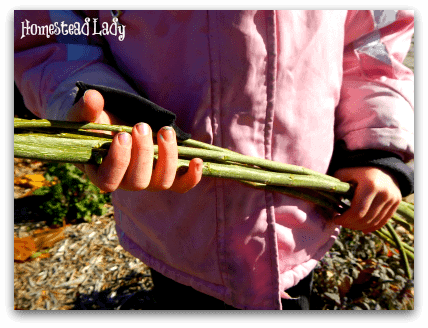
- The first thing you need to do to build your winter plant protection is to harvest 6-10 slim willow branches (or any slim but strong branch available to you), about 2-4 feet long.
- The length depends on the width and height of the plant you’re trying to protect. My sage plants were easily covered with 4 foot willow whips.
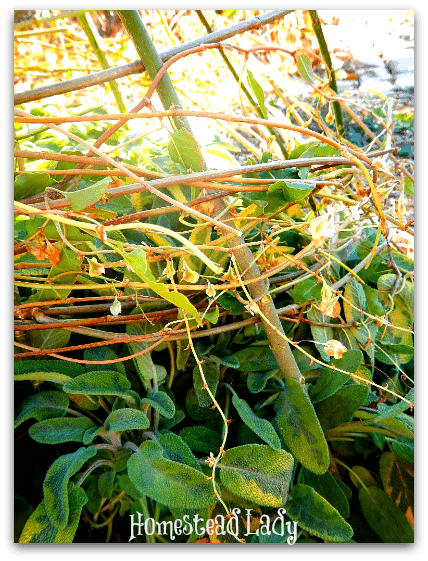
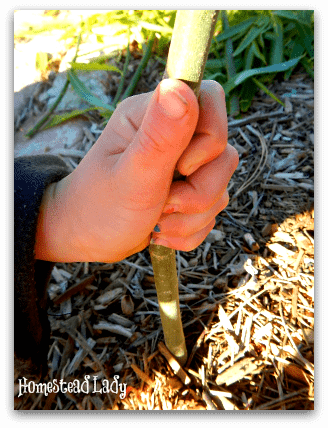
- Strip your whips (the willow branches) of all leaves – save them to add to the leaf pile over your plant.
Step two
- Plunge the widest end of the whips about four to six inches into the ground, using each whip to form a circle around the base of your plant. If your soil is already frozen, do the best you can to get them as deep as you can.
- Gather the whips at the top and tie them together with twine.
Fun fact if you’re using willow: willow contains auxin, which is a powerful rooting hormone. So, you can expect that one or all of your willow whips will sprout leaves next year if they survive the winter.
In fact, you can use willow twigs to make your own rooting hormone application for propagating plants, including growing from seed.

Step three
- Gather some vine strands, thinner willow whips or even some garden twine and weave a simple cage at the base of your tepee. This will hold in the leaves and any other organic material you want to put on for winter plant protection. To learn how to weave a basket-type section, you can visit our post on making rustic vine baskets. Or wreaths, which is simpler but similar.
- Basically, you wind the vine in and out, in and out around each of the tepee poles.
- Wedge your first vine end into the weave once its complete.
- Go all the way around in the circle several times until its a wide enough catch for your leaves.
- Secure each new vine into the previously woven vines.

Be sure to pull firmly but not too tightly as you weave so that the weave stays where you want it to but doesn’t suck in your tepee poles. You also want to be careful not be so forceful that you break a willow whip.
If you do, just yank it out and use it for kindling.
One Word of Caution
If you live in a place with high winds like I do, don’t make these unnecessarily tall. You need just enough height to get the winter plant protection job done.
A compact form will also prevent large air pockets that can fill with frost.
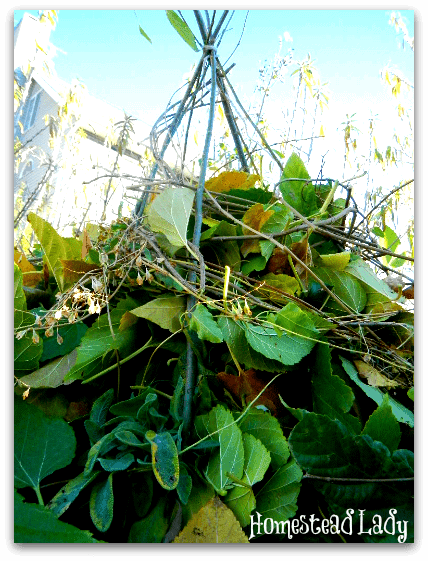
Step Four
- Gather some fall leaves – brown is better but freshly fallen will do.
- Carefully fill your tepee with the leaves all the way down to the base, pushing back the plant gently so that the leaves form a barrier between it and the outside.
- Fill all around and on top; do NOT compact the leaves.

Would you use something else to DIY your winter plant protection? Leave us a comment and let us know what you use.
The Result
This lasts well throughout the winter with no measurable damage to the tepee. The leaves compact under the snow so it is important to get the tepees cleared out before the spring gets too warm to avoid damage to the plants.
Resources for Learning More About Wattle & Coppice
The inspiration for this handmade winter plant protection came when I was reading along in my Vegetable Gardening The Colonial Williamsburg Wa
The materials for the projects come from pollard and coppice wood that they grow themselves. Growing coppice wood is a goal on our homestead, but it is a long term goal because of the time it takes to cultivate it and learn to use it.
For more information on this topic, aside from the book mentioned above, I also suggest:
- Coppicing and Coppice Crafts, by Oaks and Mills – a quality beginner book on the topics of coppice and pollard wood, including several how-to’s of making products with the wood. The authors are based in the UK where coppicing is an ancient land management practice, so some resources mentioned will be UK-specific. I own and love this book!
- Coppice Agroforestry: Tending Trees for Product, Profit, and Woodland Ecology, by Mark Krawczyk – a large and thorough book for the avid agroforester. I have been waiting for this book to appear on the market for years because of how comprehensive and useful it is at educating our generation on a practice that has largely been lost to history. I own and love this book, too!
You may also visit our tutorial on how to build your own wattle fence from scrap branches and fruit tree prunings.
–>>Read the Wattle Article Here<<–
If you’d like to grab your copy of the printable version of the DIY Wattle Fence article, follow the instructions below:
More Winter Gardening Resources
Winter Gardening Resources


Winter Foraging in Cold Climates: 50+ Wild Foods in the Snow

6 Ways to Protect Plants from Frost

Protecting Plants from Frost - 12 Ways to Beat the Cold Weather

2 Ways to Over-Winter Tomato Plants Without a Greenhouse

How Different Plants Survive Frost


wow! What a fun idea. Can I just say, I’m a little jealous of all the snow photos right now?
Ah, but there are many perks to living in Texas!
Thanks so much for sharing at Simple Lives Thursday; hope to see you again this week.