Here’s how to pound flowers onto paper for beautiful but cheap botanical prints! Forage native blooms and herbs for free and learn how to make smashed flower art for card stock and wrapping paper. This is an easy kids craft for spring and summer – it’s even fun for the grown ups!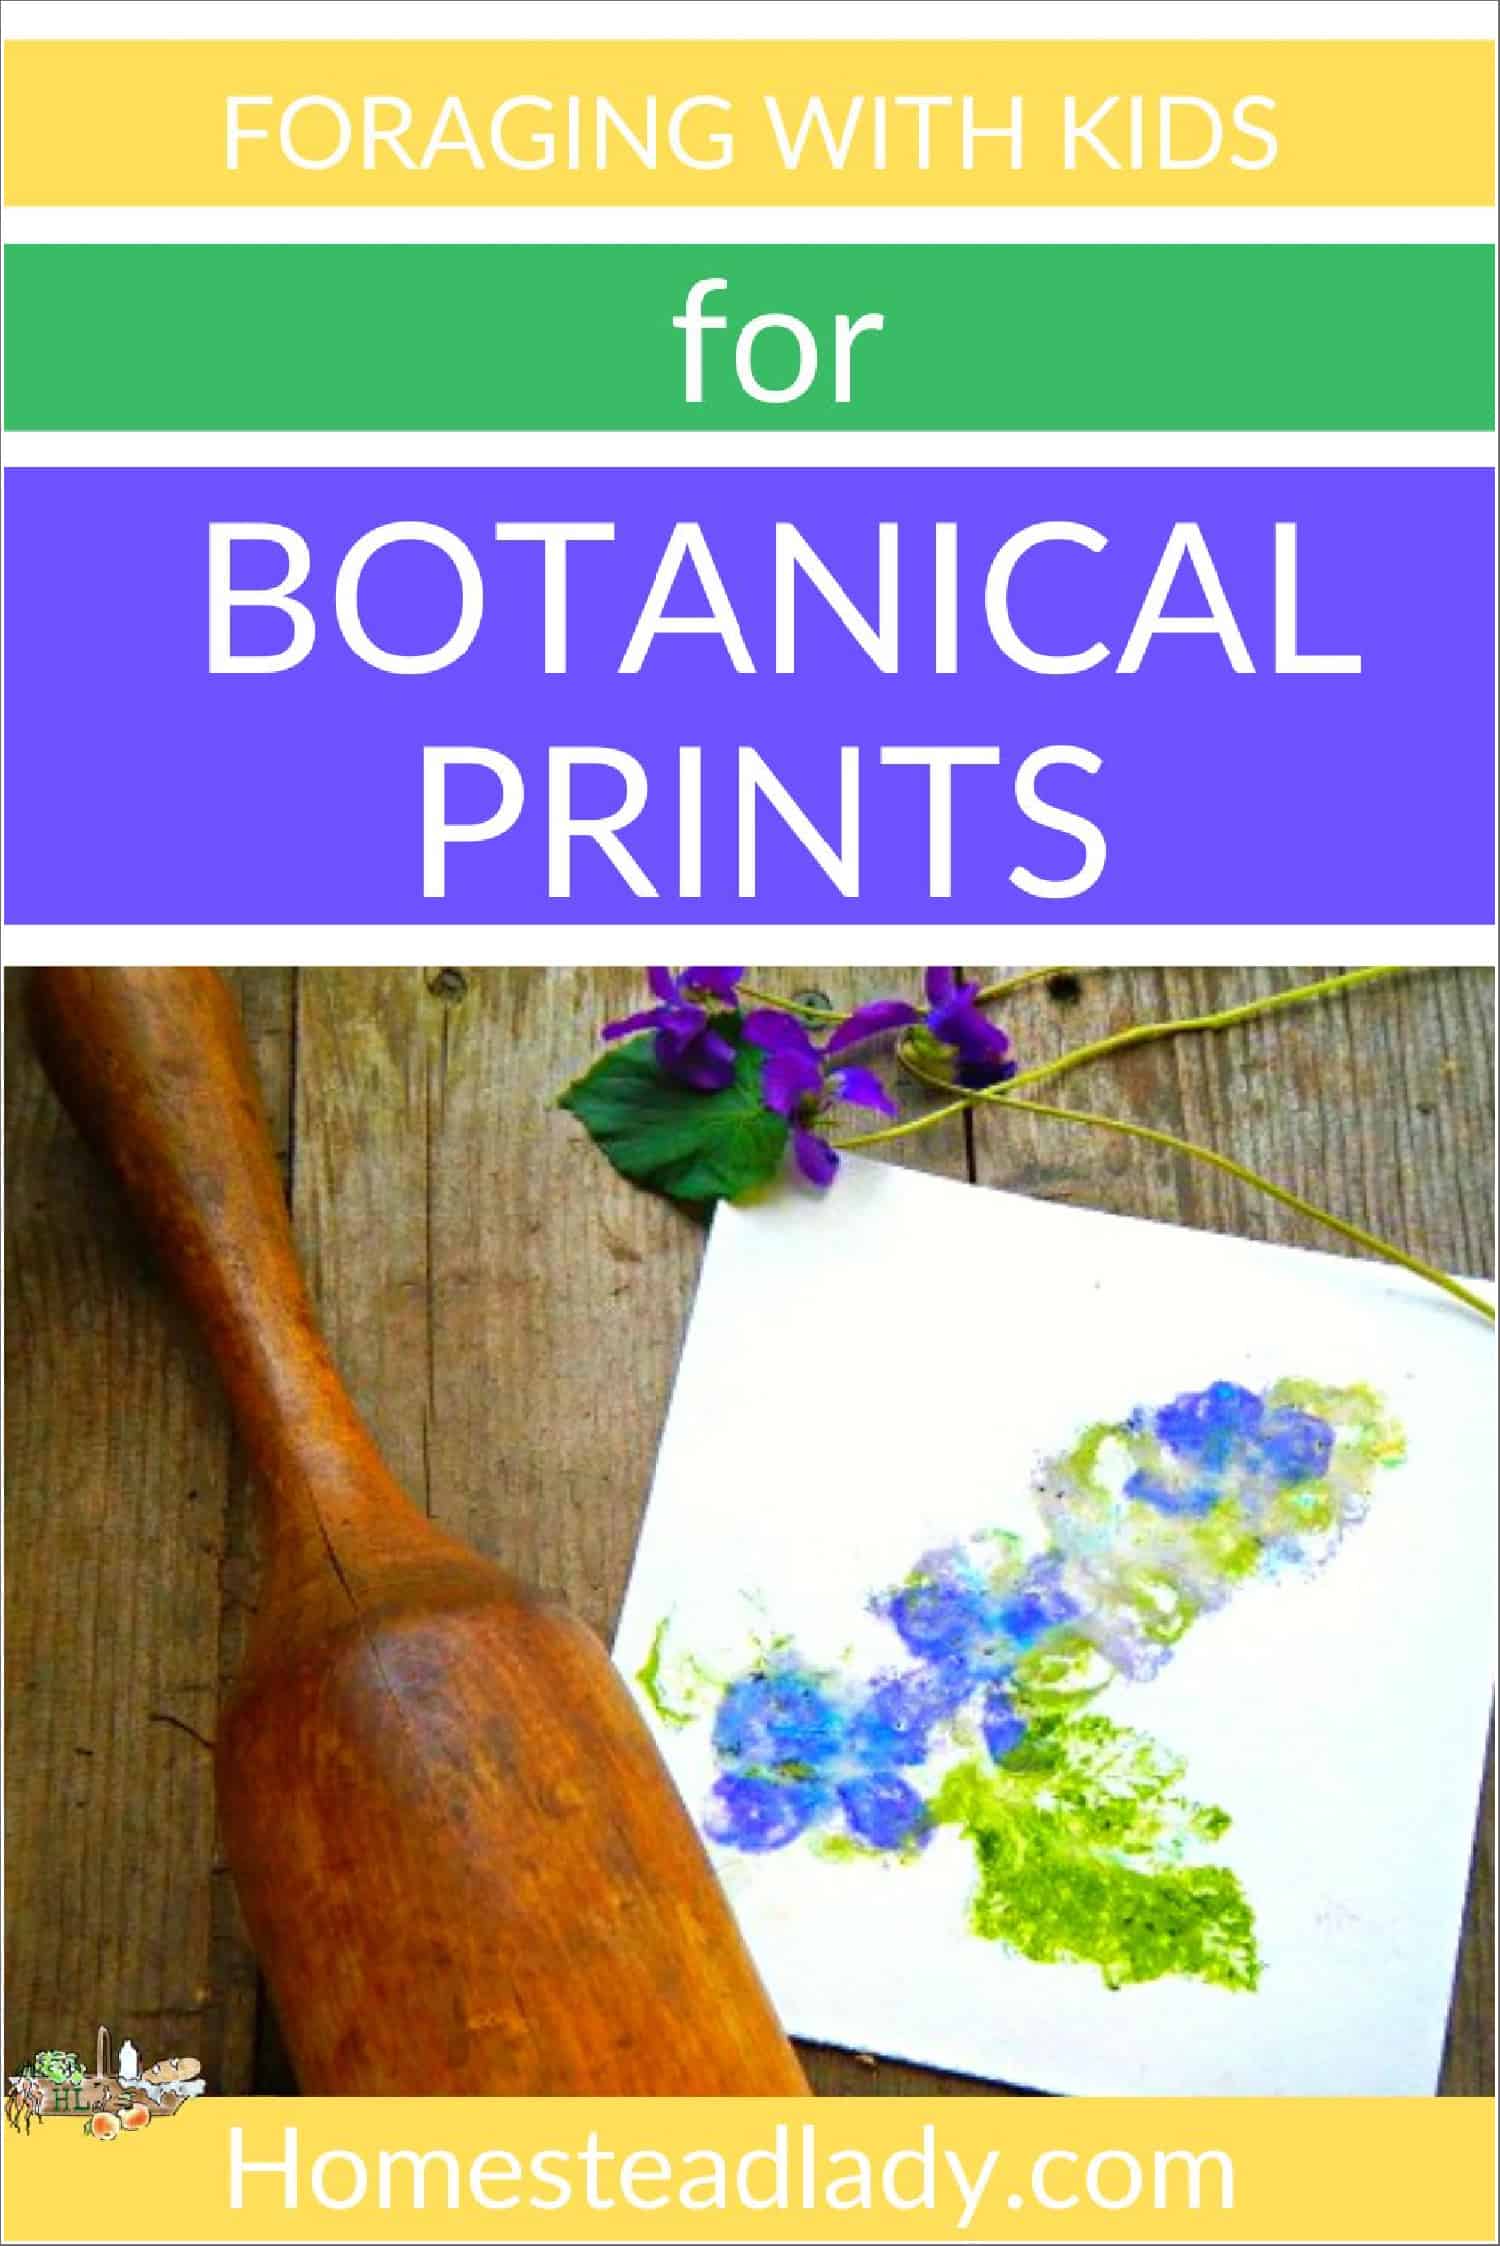
Foraging with kids is always and adventure. They see magic in nearly every blade of grass. My kids bring me blooms all spring, delightedly asking what we can do with them. What can we do with them? Make botanical prints, that’s what we can do with them.
What are Botanical Prints?
Apart from the printed, framed and fancy botanical prints you can buy in museum stores by great artists like Pierre Redoute, there are botanical prints you can make in your own backyard. This isn’t rocket science so don’t worry that this is going to get too crafty for you, if you’re not that into crafty or fancy.
A homemade botanical print is made by pounding flowers, leaves and even grasses onto paper or fabric. The color from the plants is pounded into the material, leaving behind gorgeous prints made entirely from plants.
I was in kind of funk this week but spent some time one morning reading Kathie Lapcevic’s book, Fiercely DIY Guide to Seasonal Living, in which she reminds us:
“It’s human nature to wish for something we don’t have, to want something different. That inspires growth in some instances, but I can also prevent us from enjoying this moment right now and blooming in the currently season. This week, let’s take a moment to acknowledge the things we’re wishing for that are not of this season. But, then balance that with a celebration of where we are now, a recognition of things in which we’re blooming.”
Just so you know, should you decide to purchase your own copy of the Fiercely DIY Guide to Seasonal Living, you can do that by clicking below:

Living Seasonally
There are some things I’ve been wanting to do; needing, really. But I just haven’t been able to do them.
Kathie’s words reminded me that morning that it’s ok to be a little disappointed by that, but not to let those feelings prevent me from enjoying what is beautiful and bright and happening right now. In this season.
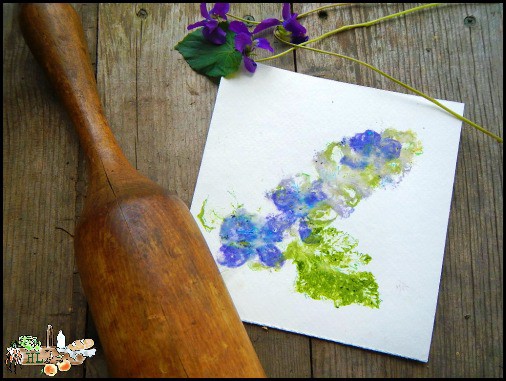
I realized, looking out my door, that what’s beautiful and bright right now are violets. Violets as far as the eye can see in some spots. Those violets sweet, unassuming and so quick to fade with summer’s approaching heat. I decided we were going to get jiggy with the violets.
More Botanical Craft Ideas & Recipes
Make Your Own Grapevine Wreaths
How to Make a Botanical Print
We usually use paper to make these prints that we then use to make birthday cards, bookmarks and small, framed prints.
Fabric Botanical Prints:
You can use fabric, which is a lot of fun and turns out very lovely. There are a few steps that need to be done in advance of project day to make the fabric more likely to set and keep the colors from the flowers.
To learn to prepare fabric for pounded art work, visit this link – click here.
Supplies to Make Paper Botanical Prints:
- Heavy artist paper, water color works well
- Medium sized mallet, smooth hammer or other pounding-type tool (I used my kraut pounder)
- Parchment paper or a light towel
- Flowers and interesting leaves from around your garden
Here’s a quick video tutorial to watch first. Then, read the instructions below and let me know if you have any questions by leaving a comment on this post. I’ll get right back to you!
Begin Procedure to Make Botanical Prints:
- Gather flowers and leaves from around your yard and cut your heavy paper into usable pieces; number of flowers and the size of the paper will depend on your project.

- On a flat, strong surface, lay out a piece of parchment paper, placing your artist paper on top. We usually do this on our concrete patio.
- Place your wild flowers and other botanicals on your paper.

- Cover the flowers with another piece of parchment paper.
Pound Botanical Prints
- Pound gently but firmly on each flower and leaf. You want to pound out the color but not destroy the paper beneath. You can have your kids practice on scratch paper first.
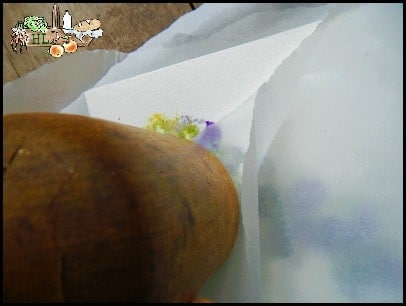
- When you think you’ve extracted all the color, pull back the top layer of parchment paper and scrape off the mashed plants with your fingernail or tweezers. My son likes to leave bits of plant on the card just too look “messy”, which he says is cool.

Finish Up Botanical Prints
- If you’re not satisfied with the print, add some more and pound again. Experiment until you find your favorite flowers and placements.
- After you’ve cleaned your paper of plant bits, you can touch up outlines or add embellishments with crayons, colored pencils or pens.

- Spray lightly with artist fixative, hair spray (not my favorite because its really sticky) or even plain vinegar to help preserve the color of the print as long as possible. I happened to have a vinegar rinse mixed up to spray down my shower after each use, so I used that this time. Just use a light mist of spray and it will dry up nicely.
A note on the vinegar spray:
By the way, I found the recipe for that vinegar spray in Chris Dalziel’s stupendous book The Beginner’s Book of Essential Oils. She doesn’t mention any particular brand of oil at all, which is a nice change from most publications. Each recipe and piece of advice is down-to-earth and actionable. I love this book.
More To Do With Spring and Summer Blooms
There are so many things that can be cooked and crafted with blooms and greens this time of year! Here are just a few ideas to get you started.
Things to Do with Blooms


spring flower sugar cookies


Edible Flower Ice Cubes

Spring Flower Craft Ideas

DIY Resin Flower Pendants
To learn more about the amazing things you can make from foraged plants, be sure to check out the Herbal Academy’s newest course – it even has a coloring book! I guess I’m a kid at heart and am super stoked about that part…


Leave a Reply