Here’s how to make easy wildflower and herbs seed bombs from clay! These homemade seed starters are great for Earth Day, Mother’s Day or everyday in the garden. Seed bomb making is a fun family or school project for kids and adults alike! 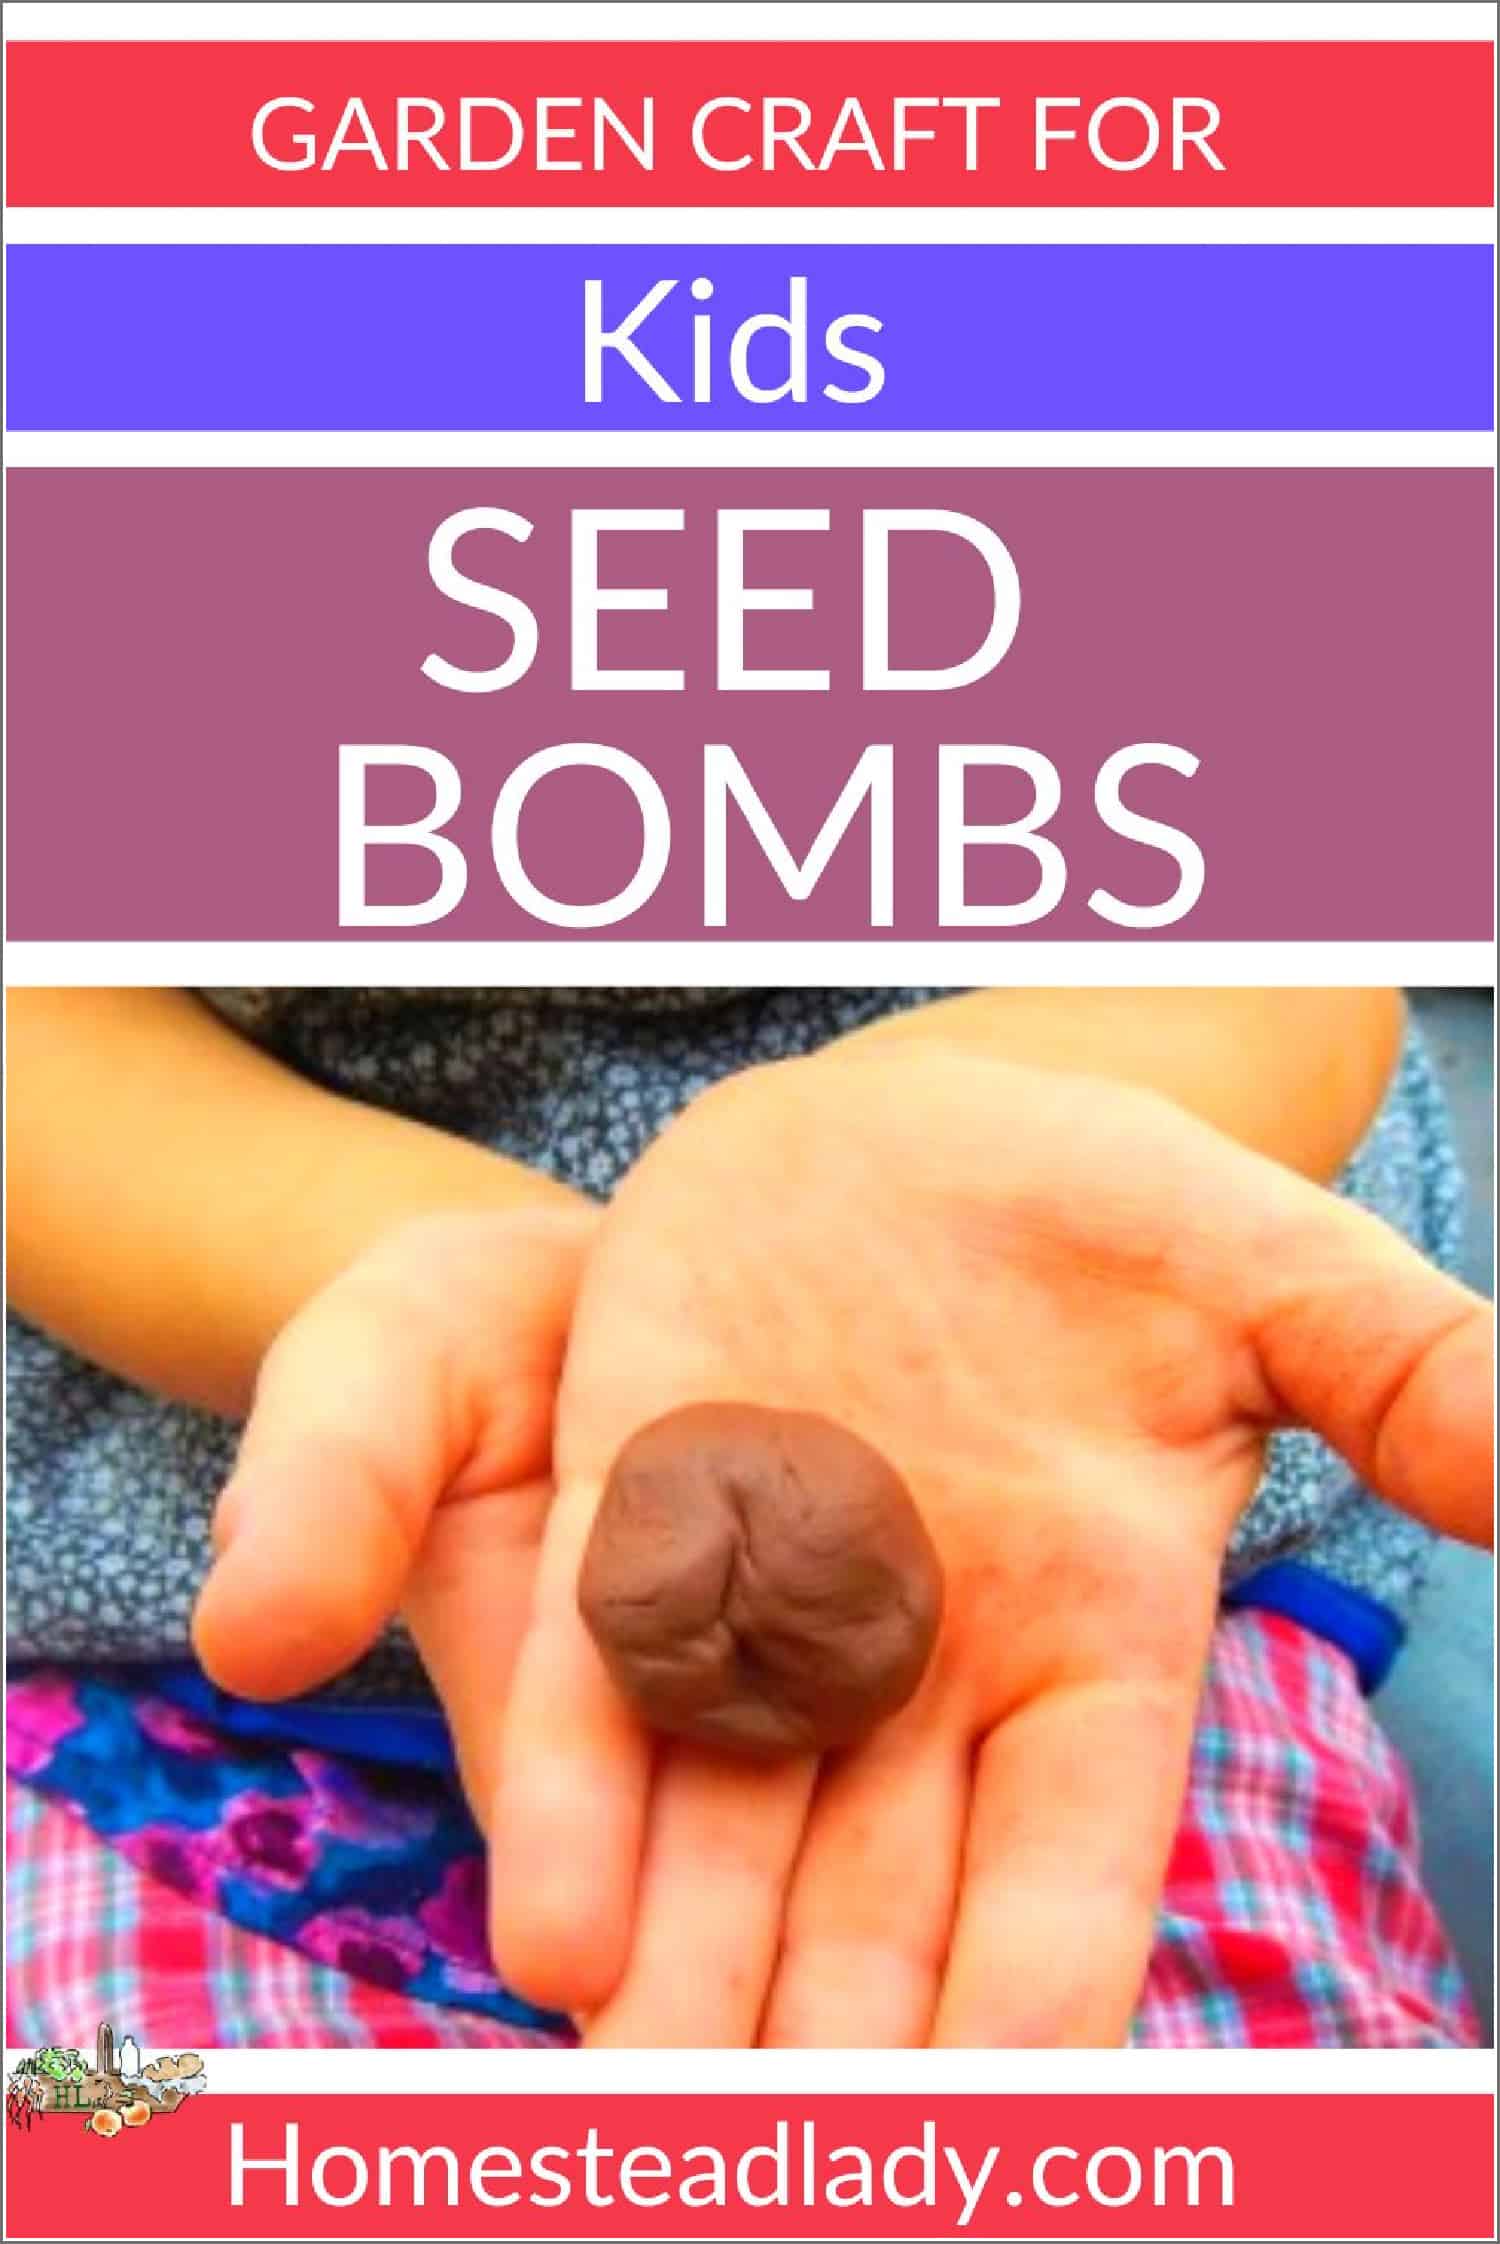
Seed Bomb History
The kids love the big mess they can make with seed bombs and you can enjoy the great conversations you will have about the importance of growing your own food and planting flowers for the bees. This garden project isn’t new, though!
I confess freely that making seed bombs from clay was NOT my original idea. Actually, seed bombs have been in use for centuries and they’ve been made from many materials through the years.
Seed bombs regained their popularity in our modern culture through the efforts of the microbiologist and pioneer in “natural farming,” Masanobu Fukuoka. He believed that you didn’t need to fertilize, use pesticides or even weed in the garden, but that you let nature decide what would grow or not grow. (That’s a very simplified version of natural farming, by the way.)
Seed bombs were made and used to provide a variety of different seeds in an area. In urban settings, you may find your garden savvy friends tossing them into abandoned home sites or vacant lots covered in weeds. (That’s not something I can publicly condone since even abandoned home sites are still private property.)
We’ve used paper to make seed bombs in the past, and that’s an easy method that has the added benefit of upcycling scratch paper laying around your house.
Do Seed Bombs Actually Work?
Because they’re as soooooo many different mediums people use to make seed bombs, the answer to that isn’t straightforward. They can work wonderfully if you use the correct materials.
Here are some tips for success with seed bombs:
- Use new seed that is zoned to grow in your area.
- Use clay or paper for best results. You want a material that will hold up well to the elements without being impenetrable.
- I’ve found the best success with seed bombs by placing them in the late fall and winter, especially if I’m using wildflowers.
- Don’t throw them anywhere with high foot traffic (where people or animals walk all the time).
Stamped Medallion Seed Bombs
Here’s what you’ll need to make these clay stamped seed balls:
- Natural clay (not the kind you need to bake)
- Good potting soil or compost or a mix of both
- Seeds (wildflowers and hardy herbs are a good choice – Echinacea, poppies, goldenrod, yarrow, bee balm are some ideas)
- Cinnamon, powdered
- Rubber stamps and ink pads (optional)
How to Assemble Seed Bombs
- Take a small chunk of clay, about an inch in diameter.

- Warm and flatten it in your hands so that it looks like a sprawling circle.
- Add a teaspoon of potting soil to the center and sprinkle on cinnamon as an antifungal for when the seed is getting wet in the elements and its protective clay has washed away. Chris from Joybilee Farm also suggests using turmeric for the same reason – great idea!
- Add a few seeds to the center of the soil.

To Finish the Seed Bombs
- Close up your seed bomb by folding your clay in half and sealing closed the edges, making it look like a closed taco or a pierogi. Clay is great because you can just smooth your finger over the edges until they stick together.
- Gently push and mold your clay on a flat surface until it’s in the shape of an oval – or circle or square, whatever you like. The depth isn’t really that important but try to keep it around 1/4 inch and uniform. This will help ensure that your seeds are exposed to the elements at about the same time.
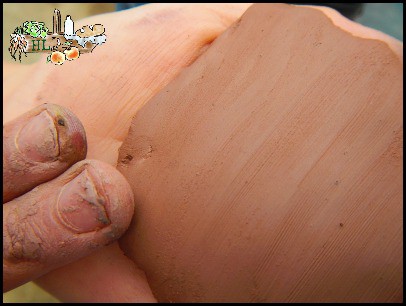
- Gently press your choice of stamp into the surface of your clay. Use a rolling motion to keep your image as clear as possible. Begin by gently pressing one edge of your stamp into your clay and rolling the stamp to the other side, pressing down evenly.
- You can use ink, if you’d like, to give the clay a little color. If there’s a goof, just smooth it out with your finger slowly, and being again. If a hole appears in your seed bomb, add another thin layer of clay.
- Air dry and then wrap to give as a gift or plant right before a good rain.

Note: The only secret is in being gentle with the stamps so the picture ends up clear. If you have artists tools for clay, or want to use a bamboo skewer, you can etch your own designs into the clay. I do projects like this with five children, ranging in ages from 13 to 3, so I like the simplicity of stamps. However, my teenager went off to the side and started engraving Egyptian symbols into her clay with a small stick.
An Educational Aside
If you’ve ever made your own seed bombs, feel free to let me know if you’re technique is different. I’d also enjoy knowing what kind of seed you decided to plant – that will vary so much from growing zone to growing zone.
Aren’t familiar with your “growing zone”? No worries, check out the course below:

More Seed Resources
For a little more education on seeds, especially wildflowers, here are some links to consider.
Wildflower Seed Resources

How to Make Seed Bombs with Recycled Paper


Naturally Dyed Seed Bombs

50+ Flowers to grow in a Bee Friendly Garden

5 Tips for a Bee Friendly Yard - Do Your Part to Save the Bees

12 Common Flowers to Plant for the Bees (that are good for us too!)


Great Article!!
I would love it if you could please come over and join us on the Homesteader Hop. It is a new blog hop that runs every Wednesday! Please come by and share up too three of your articles.
https://www.floydfamilyhomestead.com/2016/05/04/the-homesteader-hop-1/
Thanks so much for the invite!