Step by step vine wreath tutorial for a DIY fall project. Use these wreaths for farmhouse ornaments or gifts; decorate them or leave them natural and rustic. The best part is you can make them for free from your garden!
Fall Project: How to Make a Wreath
Every year as I was growing up, we’d prune back my grandmother’s grapes in the fall. She lived in Northern California where the growing season is 11 months long and we didn’t have to worry about things like severe frost and snow. We’d sit on the grass, stripping leaves from the prunings and carefully form them into fat wreaths.
—>>>Learn to make hand woven plant pots and vine baskets<<<—

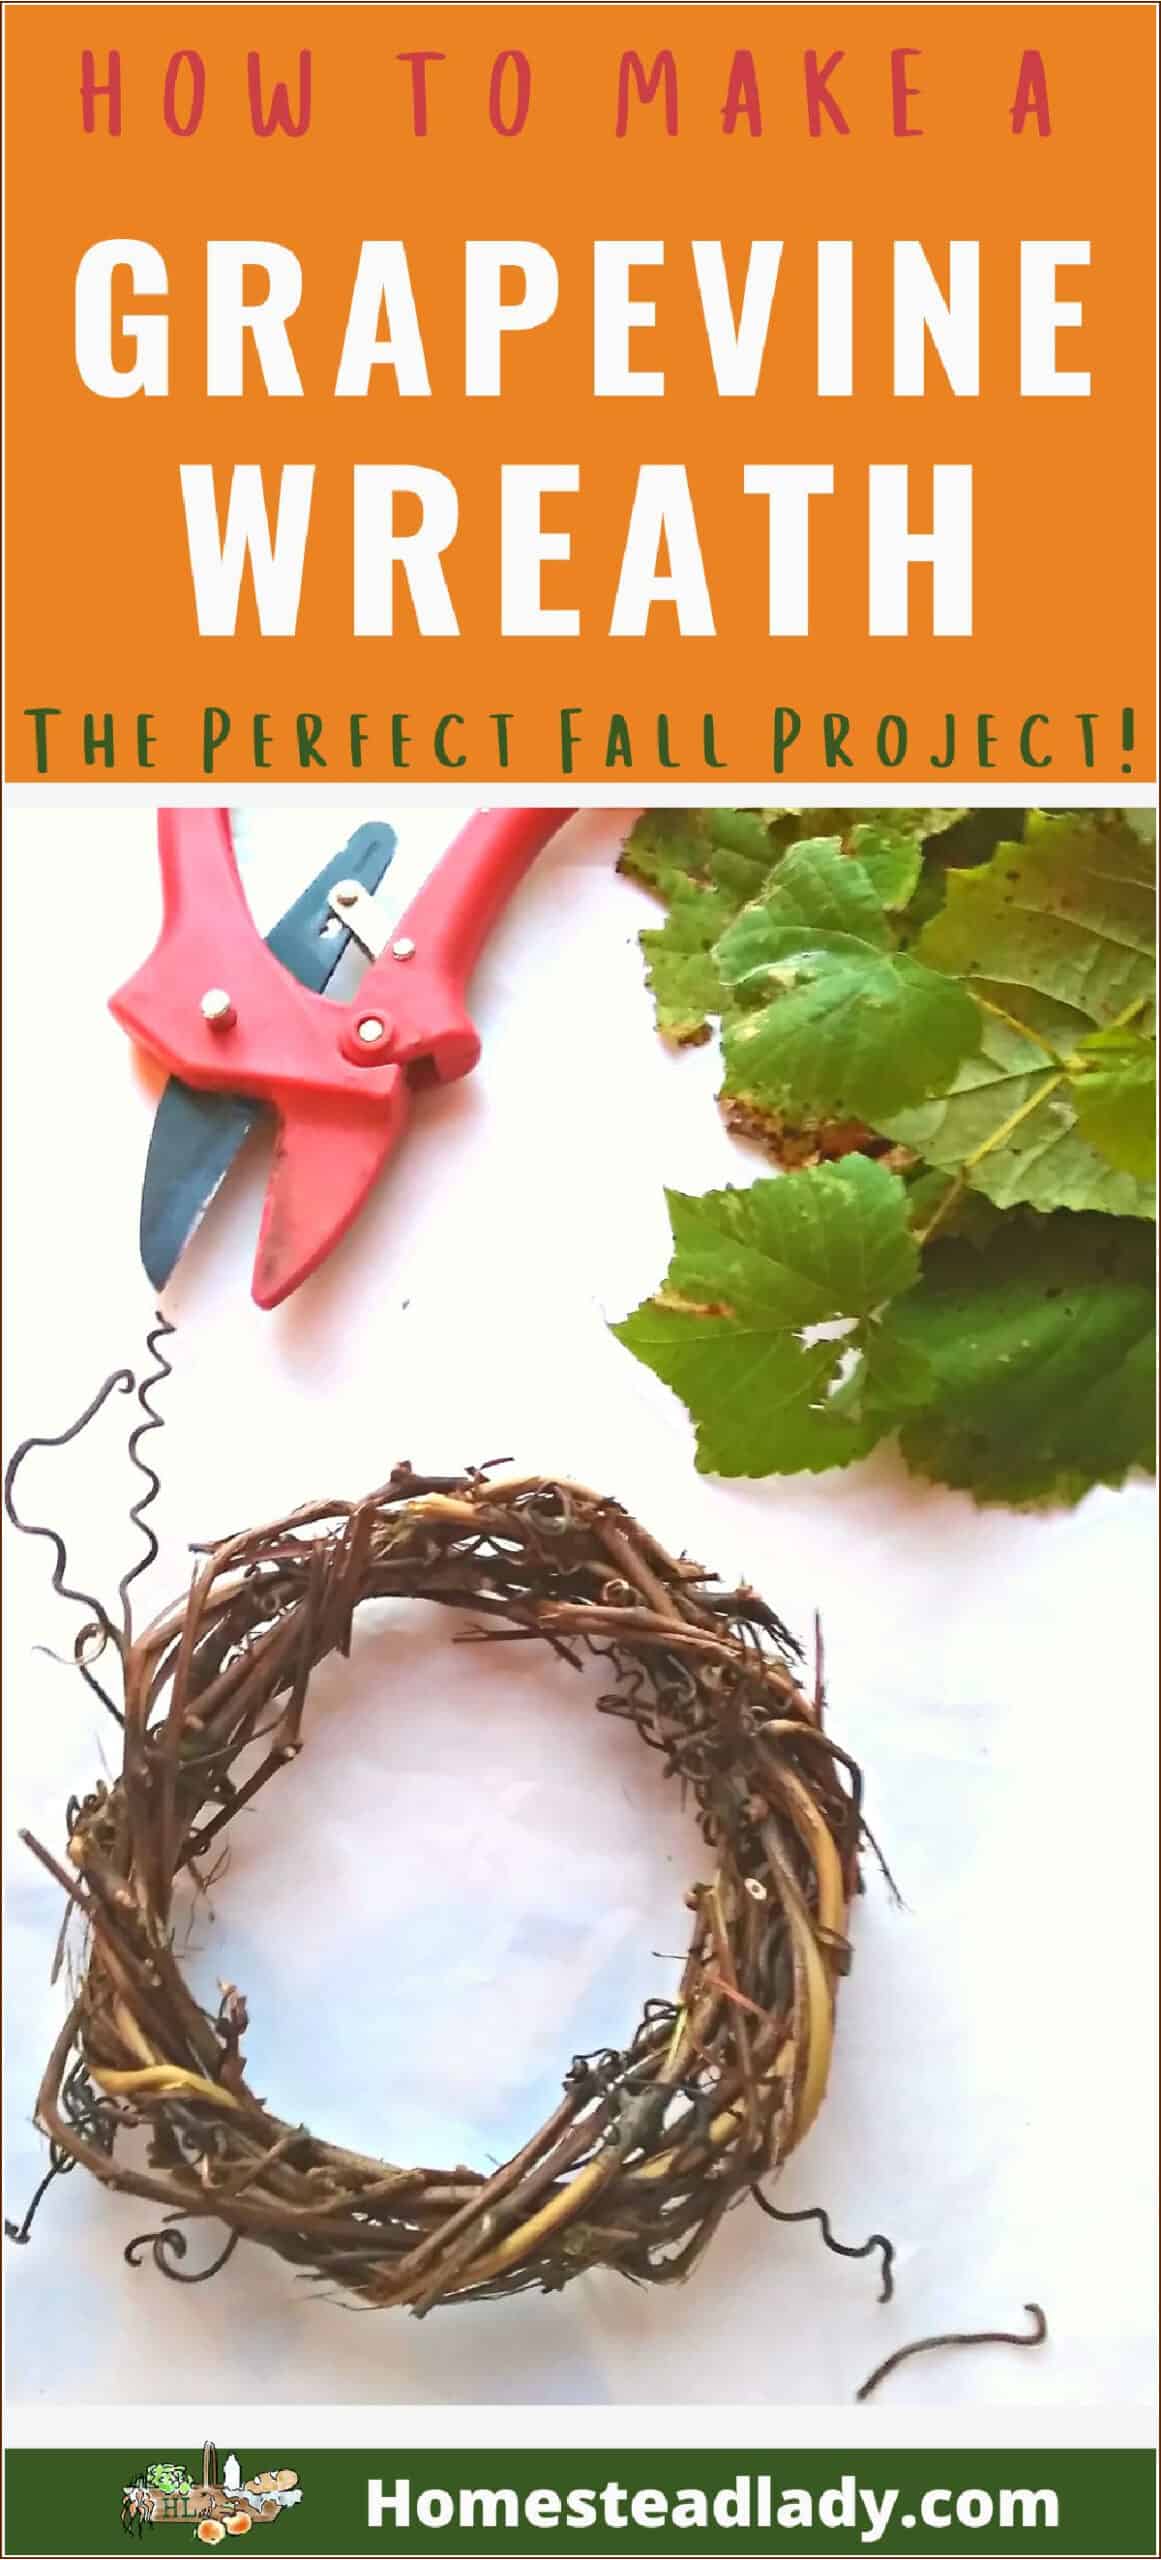
What is a Grapevine Wreath Made Of?
Traditionally, a grape vine wreath is made from the leftover vines from pruning grapes in the late winter. You can also make them in the fall if you cut back some of the summer growth from the grape vines. I love grape vines for wreath making – especially the curly-cues that reach off the vines.
If you grow your own grapes, you may want to do some lighter fall pruning to help shape the vines for the coming snow load. Pruning stimulates growth so if you have a severe cold headed your way, better to keep your cuts minimal so that you don’t encourage your vine to put off a bunch of new growth only to have it freeze off.
Also, do your wreath making earlier in the fall as opposed to right before you customary snows come. You need a lot of vines for larger wreaths because a green wreath (one made while the vines are still alive) will shrink in size to about half when dried.
More Natural Craft Ideas
Herbal Holiday Grapevine Wreaths
Fabric Scrap Wreaths for Any Holiday
How to Make a Dried Citrus Garland
What Kind of Vine to Use?
Any semi-woody stemmed vine will work to make wreaths from, as long as you can bend it. I’ve used grape vine, like I said, and they’re very sturdy and durable. You can also use lace vine, honeysuckle vine, thin willow branches and wisteria before and they all worked well.
In most climates, fall is a great time to either winter prune your vines by cutting them way back or you can just do lighter pruning to shape and control fall growth.
Each vine has its own characteristics and the best way to learn them is to experiment yourself and see what pleases you. This year, we’re making lace vine wreaths because, if I don’t prune that monster back, the snow is going to topple the fence on which the lace vine rests.
I love lace vine with its amazing growth habit, its lovely white blossoms and its year round beauty.
How Do You Dry Grape Vines for Wreaths?
The best way to dry grape vines is in their finished shaped because they are NOT pliable when dry. Once cut, the vines pliability can be extended by soaking them in water for a few days. Do not leave them in the water for more than three days because the fibers of the vines will start to break down.
Still, the best way to work the vines and get them into the shape you want is to craft them while green.
How Do You Soften Grape Vines for Crafting?
We talk about this in detail in our plant pot and basket making post, but in brief, to soften vines that have dried out:
- Fill a trough or large container with warm water.
- Place the vines into the water until they’re completely submerged. This is easier if the vines are bundled in the round because they’ll fit in a smaller container; if they’re lengthened out, you’ll need a long container.
- Soak for at least eight hours. Weigh down the vines or refill the water to keep the vines submerged.
- Remove and allow to drip dry-ish. Don’t allow the vines to dry out completely, or they won’t be pliable.
- Use as needed for your craft, but work gently, especially with thicker vines. Also, gently pre-bend the stiffer vines before use; this will pre-crack and gently mold the vines.
How to Make a Vine Wreath
Be sure to watch the video and read the first set of instructions. This first set is super simplified to see if it’s something you really want to do. Below that is a more in-depth list of instructions with a little more detail. Let me know if you have any questions.

Fall project: How to Make a Wreath
Equipment
- Garden Clippers
Ingredients
- Grape Vine in various lengths
Instructions
- Trim a length of grape vine three to five feet long.
- Remove leaves but leave curly ques because they help hold the wreath together and look cute.
- Form a circle about three to five inches across for a mini wreath. The larger the wreath, the stronger and thicker the wreath structure will need to be. Plan to cut five to ten vines to begin a larger wreath, and just experiment until it looks the way you want.
- Weave around the circle, put the loose end of the vine through the “O” of the forming wreath. Wrap the vine around the “O” and continue to put the end through the center, pulling it out the other side and wrapping it around. This will begin to form a loose “O”.
- Hold the end with your hand while you weave the wreath and then tuck the end in along the way.
- Continue to weave in a circle by taking the end of the vine and putting it inside the circle. Pull the end of the vine out the other side and wrap it around the wreath. It’s a bit like sewing with a needle – in and around, in and around.
- Pick another length of vine and pop the end into any hole on the “O” you can find. Start winding and weaving in the new vine as you did before.
- Once you get to the end of that vine, secure the end in any hole or chink you can find. Keep your winding as tight as you can without breaking the vine. Each layer will build upon the last, securing each other to the frame.
- Keep twisting on new layers of vine until you either run out or your wreath reaches the desired thickness.
- Set the wreath on a flat surface with good air circulation. Resist the temptation to hang the wreath while it dries as this may cause the shape of the wreath to turn into more of an oval than a circle.
Notes
In Depth Directions – First Step – Cut Vines
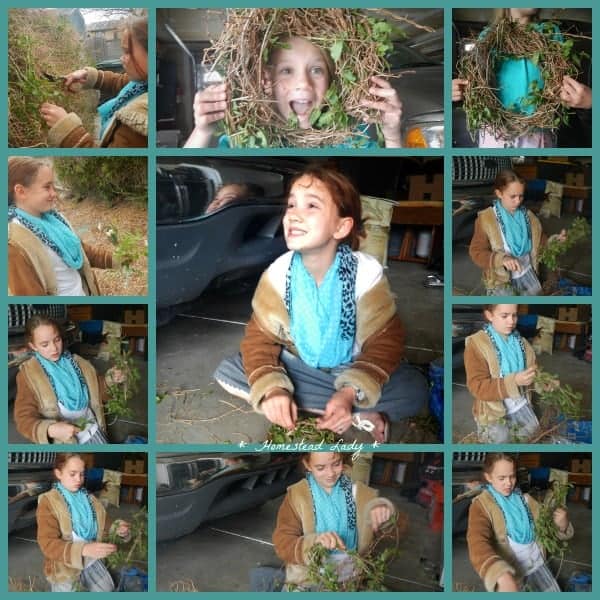
This fall project is great to do with children, with a group of friends, fellow crafters or any group willing to get a bit dirty and have some fun.
- Use sharp garden clippers to cut vines; make the vines as long as you can. Look for vines that are supple enough to bend. Plan for three 5′ lengths for one small wreath. For larger, thicker wreaths, gather five times that amount to begin. Bear in mind that the vine is alive and needs to be pruned properly, so don’t take too much. A good rule is to always do what’s best for the plant. Learn to prune grape vines here.
- Having said that, most prolifically vining plants are pretty sturdy and usually appreciate a bit of a haircut now and then. The longer the length of vine, the less tucking and securing of ends you’ll need to do later on and that’s helpful.
- Unless you really want the look of dried leaves (which shatter over time) in your wreath, remove leaves by running the lengths of vine through your gloved hands in order to pop off the leaves. Leave the curly vines, if you’re working with grape vine and like them. The curlies help the vines stay in place better as you weave the wreath.
Begin Twining the Vines to Make a Frame
- Find the largest and longest vine. Make sure it’s bendable by slowly moving your hand along the vine, gently bending as you move down the vine. This long vine is the beginning of your wreath and will act as the foundation for the frame you’re about to create.
- Hold the vine curling the thickest up and the thinner end down to form a circle. Make sure the circle is the size you want and then start weaving the end of the vine around the circle.
- To “weave around the circle”, put the loose end of the vine through the “O” of the forming wreath. Wrap the vine around the “O” and continue to put the end through the center, pulling it out the other side and wrapping it around. This will begin to form a loose “O”.
- If you feel you need to, tie the end of the vine to the newly formed “O” of the baby wreath. Usually, you can simply hold the end with your hand while you weave the wreath and then tuck the end in along the way. If you have arthritis or are otherwise uncomfortable, go ahead and tie the end.
- Continue to weave in a circle by taking the end of the vine and putting it inside the circle. Pull the end of the vine out the other side and wrap it around the wreath. It’s a bit like sewing with a needle – in and around, in and around.
Note: To Tie the End
Florist tape will work to secure the end but thin florist wire will hold a lot longer. I’ve used wire now and then with grapevine but only when I’m making a really large wreath that I simply can’t hold onto as well.
However, if you work quickly and keep your vines tight as you weave, everything should really hold itself together and you won’t need to tie the ends.
A Wreath Begins to Form
So, you have your “O” and it really doesn’t look like much and you’re beginning to wonder if it ever will.
- Pick another length of vine and pop the end into any hole on the “O” you can find. Start winding and weaving in the new vine as you did before.
- Wrap each new length of vine around the “O” – around and around. This requires putting the end of the vine through the center of the “O” each time your wrap it around.
- Once you get to the end of that vine, secure the end in any hole
or chink you can find. Keep your winding as tight as you can without breaking the vine. Each layer will build upon the last, securing each other to the frame.
To Finish the Wreath
- Keep twisting on new layers of vine until you either run out or your wreath reaches the desired thickness.
- Just a reminder, plan for your wreath to shrink in size by at least a third, sometimes a half as it dries. If you’ve twisted tightly enough, it will still hold together just fine and look wonderful.
- Set the wreath on a flat surface with good air circulation. Resist the temptation to hang the wreath while it dries as this may cause the shape of the wreath to turn into more of an oval than a circle.
How long the wreath takes to dry totally depends on what kind of vine you’ve used and how thick the vines are. Give it two weeks for smaller vines like honeysuckle and at least a month for grapevine wreaths.
You can decorate and hang it just as soon as the wreath is dry.
Troubleshooting
- Don’t worry if you break a vine here and there; it happens. Just secure loose ends and start with another vine.
- Stop every now and then to push the “O” back into shape.
- As you pull and twist, its common to weave a bit sideways so you want to stop and readjust the wreath every few vines to keep a nice, round shape.
I suggest that little children stick with little wreaths as the big ones do get really heavy as they fill in.
What to Do With Your Fall Project Wreaths
This fall project is seasonal in the making, but you can use the wreaths all year round for various things.
Small wreaths can be used to make our family’s “famous” rag quilt Christmas tree ornaments as below.

Scraps of vine can be twisted into crowns for sisters, miniature wreaths for the fairies
We’ve used our homemade wreaths for fall door decorations, Advent table decorations, and Easter/Passover
The sturdy ones will last for years and the more delicate ones will keep on truckin’ if you take good care of them. Once they’ve served their purpose, you can always add them to the woodpile and make a new one next year.
 Making wreaths is most decidedly a fall project, one that I enjoyed as a child,
and one I’m so happy to pass on to my children.
To create more cozy family times that bring you closer together, join our newsletter and download your copy of our Homestead Hygge Workbook. Hygge is the Danish concept of turning our homes into sanctuaries of light, love, and peace through simple homespun activities like natural crafts, wholesome recipes, and simple pleasures.


I wish I had read this a few weeks ago when I pruned my giant rosemary bush! I think I’m going to have to make a rosemary wreath the next time it needs a trim, I think that would smell fantastic!
Lee – that’s genius! My absolute favorite culinary herb is rosemary – well, you know, aside from basil and oregano and thyme….Let me know how it goes if you do it!