Want a tasty, no-bake treat for St. Patrick’s Day? Or any day?! Everyone’s Irish when you make these delightful homemade mint marshmallows! Add a chocolate layer for a “grasshopper pie” flair or keep it green and minty. Use organic ingredients for a healthier version of this classic treat and stop buying commercial marshmallows. Tips and troubleshooting advice included! 
More Fun Marshmallow Recipes for Later:
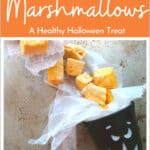
Goblin Liver (Molasses) Marshmallows for Halloween
How to Serve Homemade Mint Marshmallows
These homemade mint marshmallows can be cut small or large, depending on how decadent you’re feeling tonight!
- I usually use a rolling pizza cutter to divide up the marshmallows because it’s quick and easy.
These marshmallows pair well with hot chocolate, ice cream, and s’mores. I’ve made them at Christmastime, too, to give away as gifts for neighbors and at potlucks.
If you use essential oil, the peppermint will be strong enough to actually aid in digestion after a meal. In no way am I indicating marshmallows are a health food – they have lots of sugar! However, if you’re going to eat all those sugary carbs, the least you can do is capitalize on the benefits of peppermint.
You can package homemade marshmallows to give as gifts or send in care packages. You can also simple serve them as a main dessert at family dinners, or add them to other desserts like fudge or cake.

Why Make Homemade Marshmallows?
Homemade marshmallows are worth learning how to make because they’re delicious – so much better than store bought. Like I said, they are a dessert, but they’re a bit healthier when you make them yourself.
When you make your own marshmallows, you can avoid ingesting the high fructose corn syrup you’ll find in many commercial brands. Alternative sugars for making or augmenting marshmallows include:
- Organic cane sugar
- Honey
- Molasses
- Raw sugar (as with the chocolate layer of these homemade mint marshmallows)
- Even keto sugar!
You can also add inclusions like chococlate chips or strawberries or applesauce.
In short, homemade marshmallows are adaptable!
Naturally Dye Homemade Marshmallows
Another reason to make your own marshmallows is because you can use a healthier kind of food dye!
- For example, our snowball coconut marshmallows are blue but they’re naturally dyed with butterfly pea flower syrup. No chemicals, no nasty side effects!
- As another example, our orange Halloween marshmallows get their color from winter squash like pumpkin. How many treats have you had lately that include a vegetable?!
These homemade mint marshmallows are colored by a commercial plant-based food dye (also with no chemical, no nasty side effects). You could also use several tablespoons of matcha powder added at the very end of whipping.
We’ve used strawberry powder and cranberries for both color and flavor. There’s a way to use both fresh fruits and veggies, as well as powdered (dehydrated or freeze dried). Both have their pros and cons.
If you want to explore the idea of natural dyes a bit more after making these homemade mint marshmallows, here are a few articles to peruse:
Naturally Dyed St. Patrick’s Day Cookies – 3 Ways!
Naturally Dyed Easter Eggs – Commercial vs. Homemade
The bottom line is that DIYing homemade mint marshmallows means that you can truly adapt this treat to your family’s needs.
Are Homemade Marshmallow Hard to Make?
Ok, this is a super legitimate question because homemade marshmallows look really fancy. They seem like something that would be tricky to make.
But they’re not!
Marshmallows are a soft candy, so you will need to:
- Have a heavy-bottomed medium/large pot
- Purchase a candy thermometer and be able to read it
- Keep hot mitts nearby
- Have a source of water for clean up
There you go; that’s it!
The process of making homemade marshmallows is no more complicated than mixing water and sugar in a pot, stirring it, heating it, and whipping it. You’ve totally got this!
However, to help you feel more prepared for the process, I highly recommend you read our foundational article: Make Homemade Marshmallows.

There are lots of tips and troubleshooting points in that article that I hope will help you be successful the first time you try to make homemade mint marshmallows.
Homemade Mint Marshmallow Recipe
I prefer to make these homemade mint marshmallows with a chocolate layer because, well, chocolate. Also, I like the look of the two layers together. These make a great St. Patrick’s Day treat that can serve a crowd.
If you have someone who loves that “grasshopper” mint and chocolate combination, these will be a winner, too! They will melt into hot chocolate, as well as work over a campfire for s’mores.

Homemade Mint Marshmallows with Chocolate
Equipment
- 1 Candy thermometer
- 1 Medium Large Pot
- 1 Mixer, Hand or Stand
- 1 9" x 11" Casserole Dish, Lined with Parchment Paper
Ingredients
Chocolate Marshmallow Layer
- 1/2 Cup Unchlorinated Water
- 3 Tbsp. Organic Beef Gelatin
- 1/2 Cup Unchlorinated Water
- 2 Cups Organic Cane Sugar
- 1/2 Cup Cocoa Powder
- 1/2 tsp. Sea Salt
Mint Marshmallow Layer
- 1/2 Cup Unchlorinated Water
- 3 Tbsp. Organic Beef Gelatin
- 1/2 Cup Unchlorinated Water
- 2 Cups Organic Cane Sugar
- 1/2 tsp. Sea Salt
- 5 Drops Peppermint Essential Oil, to Taste or 1/2 tsp. Peppermint Extract
- 10 Drops Plant-Based Green Natural Dye or 1-3 Tbsps. Natural Powdered Plant-Based Dye*
Instructions
Preparing the Gelatin
- This process is the same for both layers: Place 3 Tbsps. gelatin in the bottom of the mixing bowl. Add 1/2 cup of water and stir with your finger or a spoon to incorporate the gelatin and the water.
- Set aside to "bloom" (water absorbs into the gelatin).
Making the Sugar Syrup
- This step is the same for both layers: Place 1/2 cup of water, 2 cups of sugar, (1/2 cup of cocoa for chocolate layer only), and 1/2 tsp. salt in a heavy-bottomed pot. Stir to mix.
- Over medium heat, melt the sugar. Stir occasionally, but very gently.
- Once sugar is dissolved, bring to a soft boil until the temperature reaches 225F/107C. This is called the Thread Stage of candy making. (See chart in the body of the post on what to do if you don't have a candy thermometer.)
- Remove from heat with hot mitts and bring the pot over to the mixing bowl with the bloomed gelatin. Be prepared to work quickly from here on out.
Whipping the Syrup to Fluff
- Please Note: You will make the mint and chocolate layer one at a time. Choose which layer you would like on the bottom and make that one first. If you don't want a chocolate layer, simply omit.
- This process is the same for both layers: Turn the mixer to low and slowly drizzle the hot sugar syrup mixture into the gelatin. Drizzle slowly and consistently until all the syrup is in the bowl. Use a silicone scraper to remove all the syrup you can from the bowl.
- Place the collar on your stand mixer to prevent splashing. If you're mixing in a bowl, be sure to use one with steep sides. Turn the mixer to high with the whisk paddle(s). Whip for 8 to 20-ish minutes. See notes for specifics.
- If adding color and mint flavor to the mint layer, add it now and whip it in thoroughly. Always remember to move quickly at this phase. Once the fluff has formed, it gets stickier and sticker with each passing minute.
- Scrape into your prepared, parchment-lined dish and level. I like to place the chocolate layer on the bottom, then add the mint. Remember, you will make each layer one at a time (unless you have two of every piece of equipment and an awesome helper).
- Cover with a baker's rack to allow for ventilation and then a light towel (like a tea towel) to keep out critters and dust. Set aside to cool. 4-6 hours will do for softer marshmallows; 8-12 for drier marshmallows.
- Once dried to your liking, cut into serving sizes and dust in powdered sugar or any of the suggested combinations in the article. Serve or package to give away. These will last for months at room temperature, though the flavors may begin to fade/change over time.
Notes
- How hot the syrup actually was when you started whipping.
- How much moisture is still retained from the water in the syrup.
- If you have an inclusions that cause the mixture to be heavier (you don't have any in this recipe).
- How fast the motor of your mixer can whip at high speed.
- How humid it is in your kitchen.
- lightens in color
- looks less wet and more glossy
- no longer has steam rising off of it
- begins to thicken and stiffen (a bit like merengue)
- is warm to the touch but no longer painfully hot
- If you plan to serve the marshmallows right away, 4-6 hours will be fine. Do NOT refrigerate!
- If you want to cut out shapes, use for s'mores, or simple prefer dry marshmallows, dry for 8-12 hours. Again, do not refrigerate or they will begin to dissolve.

Homemade Mint Marshmallow Notes
You will make the chocolate and mint layers one at a time, unless you have a great helper and double the equipment needed. Do NOT try to manage two batches of marshmallows at the same time! If for no other reason than that you might burn yourself trying to hurry.
- Speaking of safety, always use hot mitts when handling the hot pot or the hot syrup – it’s HOT hot!
If you don’t want a chocolate layer, simply omit it – these homemade mint marshmallows are great on their own. If you still want a little chocolate, mix in some chocolate chips when adding the dye and the extract.
- 1-2 chocolate chips should be enough. You can reserve some to sprinkle on top of the finished mint marshmallows.
- You may want to add chocolate chips even if you do make a chocolate layer – the chocolate, the merrier!
The recipe is pretty adaptable to the occasion or holiday that’s coming round to give you an excuse to make these delightful marshmallows.

Mixing the Syrup to Fluff
When you have poured all the syrup into the gelatin mixture, use a silicone scraper to clear out the rest of the syrup so none goes to waste. Watch out for sugar that has already set up and crystalized on the sides of the bowl.
How long you whip the syrup before it turns into fluff will always depend on several factors, including:
- How hot the syrup actually was when you started whipping.
- How much moisture is still retained from the water in the syrup.
- If you have an inclusions that cause the mixture to be heavier (you don’t have any in this recipe).
- How fast the motor of your mixer can whip at high speed.
- How humid it is in your kitchen.

You know when the syrup has become substantial marshmallow fluff when it:
- lightens in color
- looks less wet and more glossy
- no longer has steam rising off of it
- begins to thicken and stiffen (a bit like merengue)
- is warm to the touch but no longer painfully hot

This is worth repeating: Always remember to move quickly at this phase. Once the fluff has formed, it gets stickier and sticker with each passing minute. Spoon the fluff into your prepared dish as quickly as you can.
Be sure to share around the spoon, whisk attachment, and bowl to see if your family can manage to scrape any of the super sticky mixture off into their mouths. It’s quite a trick because it sets up so quickly!
Cleaning Up & Cutting the Homemade Peppermint Marshmallows
Once you have the marshmallows set aside to dry, be sure to put the bowl, implements, thermometer, and everything that’s gotten sticky into warm water. Allow them all to sit for a bit and you’ll be able to wash them easily. The sugary mixture softens in the water pretty quickly.

Once you’ve cleaned up and the marshmallows have dried long enough, it’s time to remove them from the pan. Simply lift the sides of the parchment paper and lay the marshmallows flat. You can remove the parchment paper by peeling it off the marshmallows.
They might stick a bit, but they’ll pull free. Then use a pizza cutter or sharp knife to cut them into bite-sized pieces or large square for true decadance.

For dusting, you can use plain powdered sugar, or powdered allulose if you’d like a lower-carb option. Other dusting options include:
- Cocoa powder mixed with powdered sugar
- Crush peppermint leaves mixed with powdered sugar
- Coconut flakes
- Matcha powder mixed with powdered sugar
Or you can leave them plain, as we usually do. I like to dry my homemade marshmallows until they’re simply not that sticky anymore.
- With any chocolate marshmallow, you’re going to experience a little added stiffness from the cocoa powder, which can be a handy bonus.
Natural Colors & Inclusions – General Notes
The mint marshmallows can be naturally dyed using a variety of ingredients from matcha powder to stinging nettle powder. Freeze dried powders have the best color retention as natural dyes, FYI.
- When experimenting, add the natural dyes at the very end of the process of whipping to incorporate thoroughly without changing the temperature of the mix.
FYI, if you make marshmallows with botanical inclusions like fruit, you can refrigerate for up to a week once they’ve been thoroughly dried and powdered. They will usually get a little limp in the fridge, but it’s better than risking spoilage of the botanical material.
That is, if they last long enough to go into the fridge. I made an entire pan of cranberry chocolate covered marshmallows for Christmas this year that disappeared in a few hours. We didn’t even have company over – it was just us! I guess I’ll have to make those again.
What flavor of marshmallow do you think I should try making next?! Just leave a comment to share your great idea.
–>> Pin This Recipe for Later <<–


Leave a Reply