If you have an herb garden, container herb garden, or are foraging wild herbs, you’re going to want to learn to properly harvest herbs. Learn how to cut, clean and dry herbs in every season to use year round! 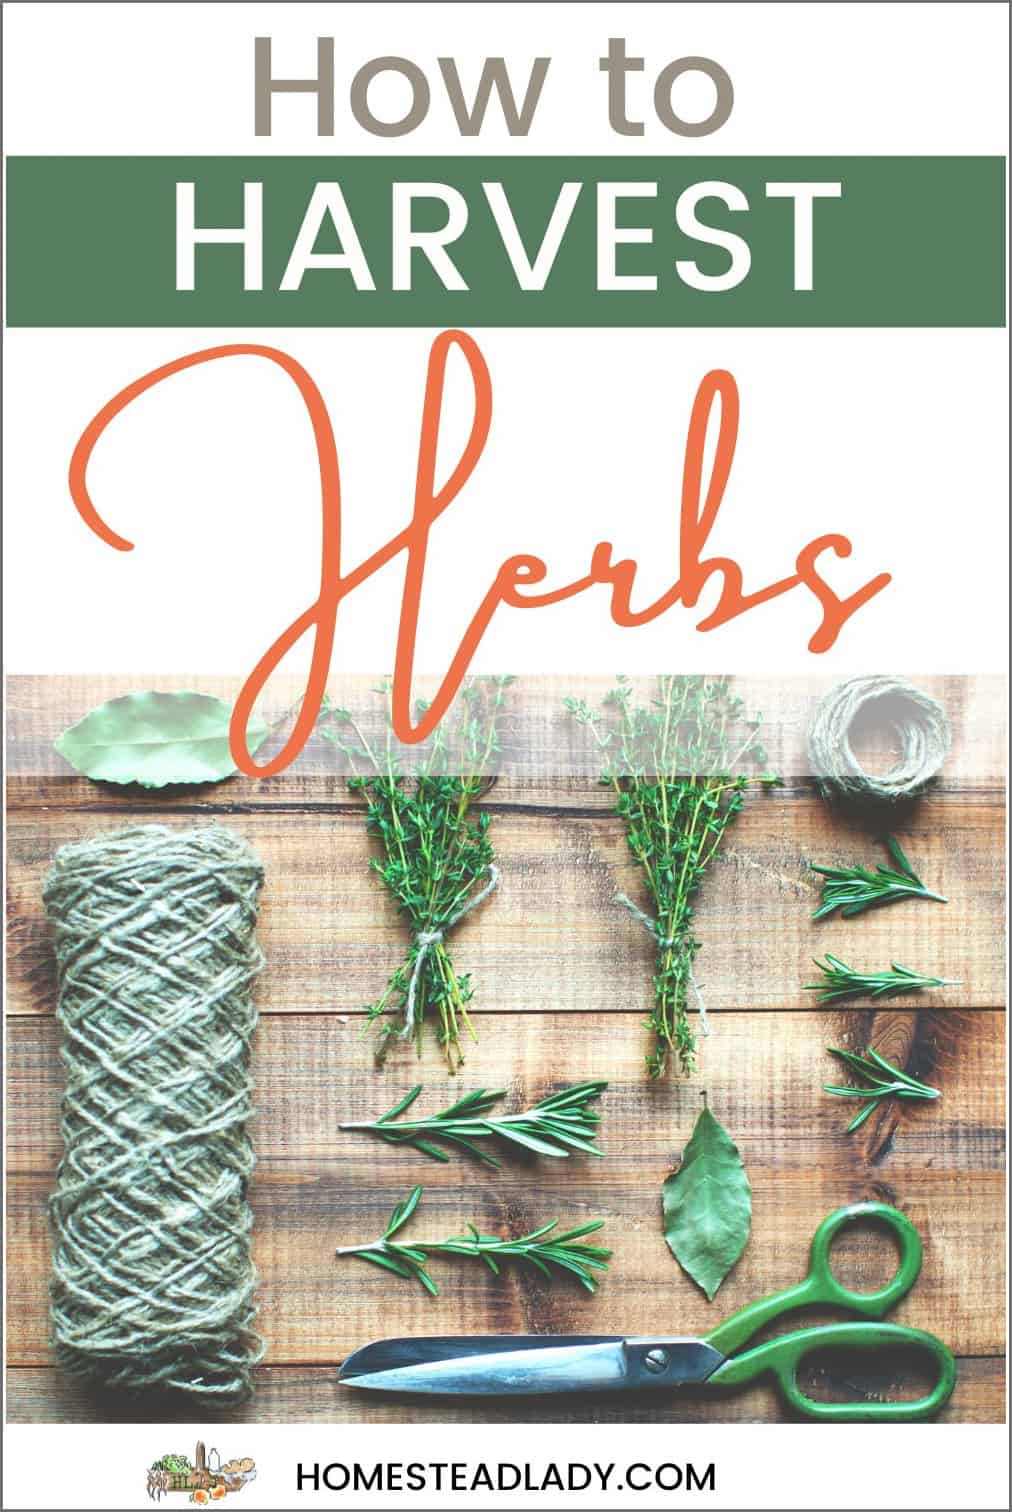
Whether you’re growing herbs in pots or harvesting fresh from your community garden, learning to harvest herbs properly is so important. Even wild herbs that can be harvested in season need to be properly cut, cleaned and dried to be used year round.
Fortunately, this process of harvesting fresh herbs is NOT complicated. Come with us to the herb garden – you’ve got this!
How to Harvest Herbs
Harvesting herbs doesn’t amount to much more than cutting them, cleaning them and drying them. However, there are some points to consider to harvest herbs that will last all year round for all your recipes and crafts.
To organize your plans for your herb garden, grab the free worksheets below:
When to Harvest Fresh Herbs
The best time to harvest herbs (or any kind of plant) is in the morning or the evening. At those time the heat of the mid-day sun isn’t stressing them out. They’re less likely to wilt or have sun damage.
You can start harvesting foraged herbs in the spring like:
- violets
- plantain
- dandelion
Other wild herbs begin to emerge in the summer like:
- dandelions
- wild roses
- St. John’s wort
- mullein
- yarrow
Some herbs will reseed so easily that they become almost wild on our land, growing afresh every year. Borage is a great example of that; please see our article about borage to learn more about it.
Many of these continue into the fall and even winter, depending on how cold your area gets. To learn more about gathering wild herbs, also called foraging, please visit our article Foraging: Wild Free Food!
If you grow your own herbs, then you can harvest them at your convenience as they mature. See more below on beginning your herb garden.
How Much Herb to Harvest
You never want to take more than one third of any plant from which you’re harvesting, so don’t get carried away. If the plant is woody, limit yourself to smaller portions as it will take longer for the plant to regrow. Wild plants that grow in abundance can typically be harvested vigorously, but never remove the entire plant! (Please see the foraging article above for more on collecting wild herbs.)
Most herbs are cut and come again. Which means that harvesting all season will mean continued bounty up until frost because the plant will produce more to harvest. Good examples of this are basil and calendula.
For a dinner recipe, you probably only need a pinch or a handful. Pinching the tops off basil and rosemary and the tips of thyme are usually good for a single recipe.
If you need more herbs for wellness recipes, only harvest as much as you know you’ll process right away. You do NOT want to waste fresh herbs by forgetting them in the bottom of the tomato basket.
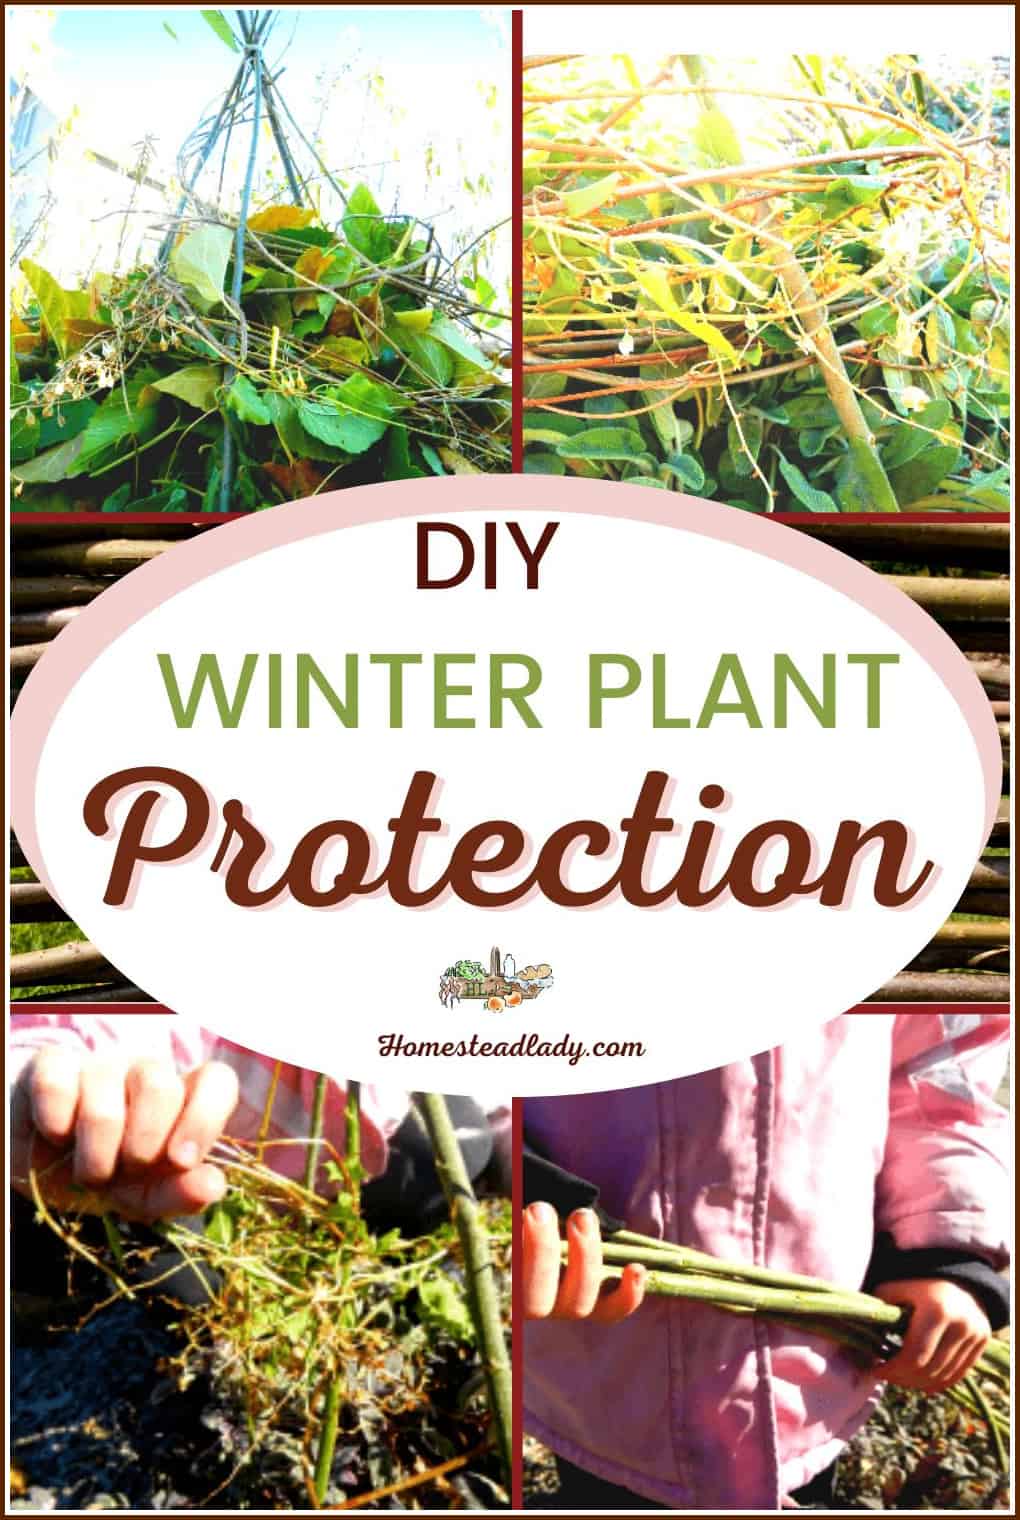
At the end of the growing season, annual herbs like basil can be pulled from the ground completely. Perennial herbs like rosemary should be heavily mulched after your last harvest to protect them well for the winter.
You may also want to consider some DIY Winter Plant Protection for your perennial herbs if your winters are severe.
Use Sharp Tools to Harvest Herbs
- When you harvest herbs, you want your cuts to be clean and precise.
- Make sure your blades and clippers are sharp.
- Cut at a 45 degree angle so the plant can heal quickly.
- Cut just above leaf junctions to encourage new growth.
You can remove any spent parts of the plants as you go, too. Older leaves, bug eaten remnants, damaged limbs can all be pruned off as you harvest herbs.
An Herbal Harvest Example from Our Homestead
It’s early fall and we had a terrible wind blast through here last week – a seventy mile an hour micro burst that took down trees! Needless to say, a few of my taller things like the bee balm are a little the worse for wear and need a cleaning up in order to heal. Also, several herbs, like my feverfew, will heavily reseed themselves if I don’t stay on top of removing their flowering stems throughout the season.
We rummaged through all of our lavender plants; it’s one of my favorites so we have several. Then, since we were out there and the baby was still napping, we also brought in two kinds of sage, plantain, feverfew, artemisia, oregano, comfrey and marjoram. Here are some ways we use all those herbs:
- The sage and oregano are both used by us in the kitchen and in winter time tea for sore throats and immune boosting.
- This is my first year with marjoram and it’s a decent little addition to sauces and soups.
- The artemisia is a great wormer for people and animals, while the plantain and comfrey are indispensable in salves for skin ailments.
- Feverfew is, you guessed it, good for fevers as it’s very calming; like most herbs feverfew is good for a myriad of things.
To get all this information, plus so much more on starting your own herb garden this year, please grab your copy of our newest book, The Everyday Herb Garden! Learn how to gather information about your site, brainstorm basic designs, prepare your soil naturally, as well as how to start your own herbal plants to save money and ensure quality. Bonus information includes how to harvest, preserve, and use your herbs. Click below to learn more and get your own copy of this useful little herb book!

Drying Herbs to Use Year Round
Air drying herbs is the easiest way to preserve your herb harvest. It doesn’t require any special equipment and is simple to do.
- After a good wash, shake out your herbs gently to remove extra water. Allow them to air dry for a few hours before hanging them to air dry. My garden is watered with secondary river water so I’m careful to wash everything I bring in. Plus, our summers are so dusty!
- To gather the harvested herbs for drying, line up the stems of like plants so that nothing gets dropped.
- Remove one to three inches of leaf matter from the ends of the stems. Toss herbal bits into your chicken or compost bucket so as not to waste them.
- In order to prevent mold as the herbs dry, don’t bundle too many herbs together at once.
- Use string or rubber bands to bind the herbs together tightly. Remember that the plant material will shrink as it dries.
- Find a warm, relatively dust-free place to hang the herbs upside down. The main thing to remember is you need a place with good air circulation where the herbs won’t be messed with while they dry.
- Air dry for a week or more, depending on the herb.
We use a bar attached to the low rafters of one of our rooms to air dry most herbs – good air circulation is a must! By having it suspended to the ceiling, the herbs stay out of the way of everyone, including the cat and the baby. I’m forever expanding this space for drying because each year we harvest and preserve more and more herbs. I never have enough space!
Dry Herbs in a Dehydrator
You can also use a set on a lower setting between 115-130F degrees. (FYI, we use the Excalibur brand dehydrator, but most brands work well.)
- Simply wash and gently shake your herbs.
- Clip of the stems and scatter leaves and flowers on your dehydrator racks.
- Don’t let any herb matter sit on top of each other.
- Depending on the herb, dehydration can take a few hours to overnight.
I advise against drying sage in the dehydrator because it will make it taste really dusty. I’m not sure why that is, but sage can be temperamental once it’s dried. Don’t using it in canning recipes, either, because it will make your recipe bitter.
Herbs dry nearly perfectly in a freeze dryer, if you have one or know someone who does. Freeze drying units are cost prohibitive for many of us, but if you know someone who has one, try to work out a barter. Offer 1/2 your herb harvest for use of their unit, for example.
For more freeze drying information, please visit our article:
—>>>Best Foods to Freeze Dry<<<—
Herbs are discussed there!
Using Harvested Herbs
We use herbs all year round for various reasons. The kitchen herbs are, obviously, used in the kitchen.
- Basil is a popular kitchen herb and can be used in so many ways.
- Here’s how to make garlic powder at home – stop buying this!
- Making compound herbal butters are another way to use fresh herbs and they’re so easy to make.
Herbs for Treats
However, we use many wild herbs in culinary delights, as well. Here are some examples:
- Dandelion Candy is simple to make and is so lovely to eat.
- Wildflower and violet popcorn is perfect for any tea time or movie night.
- Wild Rose and Herbal Syrup is a sweet syrup that can be used on pancakes or inside our herbal macaroon recipe.
- Here’s how to Preserve Herbs for Baking Needs from Homespun Sesasonal Living.
- One simple thing to do with herbs to preserve them is to make herbal salts – Rootsy can teach you how!
Herbal Wellness and a Bonus Craft
Visit our article on Calendula Earache Oil to see how we use calendula flowers and mullein leaves. In this post we highlight one of our favorite wellness herb books, Healing Herbal Infusions
Here are 12 Things to Make and Do with Dandelion Flowers by The Nerdy Farm Wife. Typically she uses her herbs in her many, many soap recipes – I love her soaps! One of her soap making books is highlighted below and I recommend it, if that’s something you’re interested in.
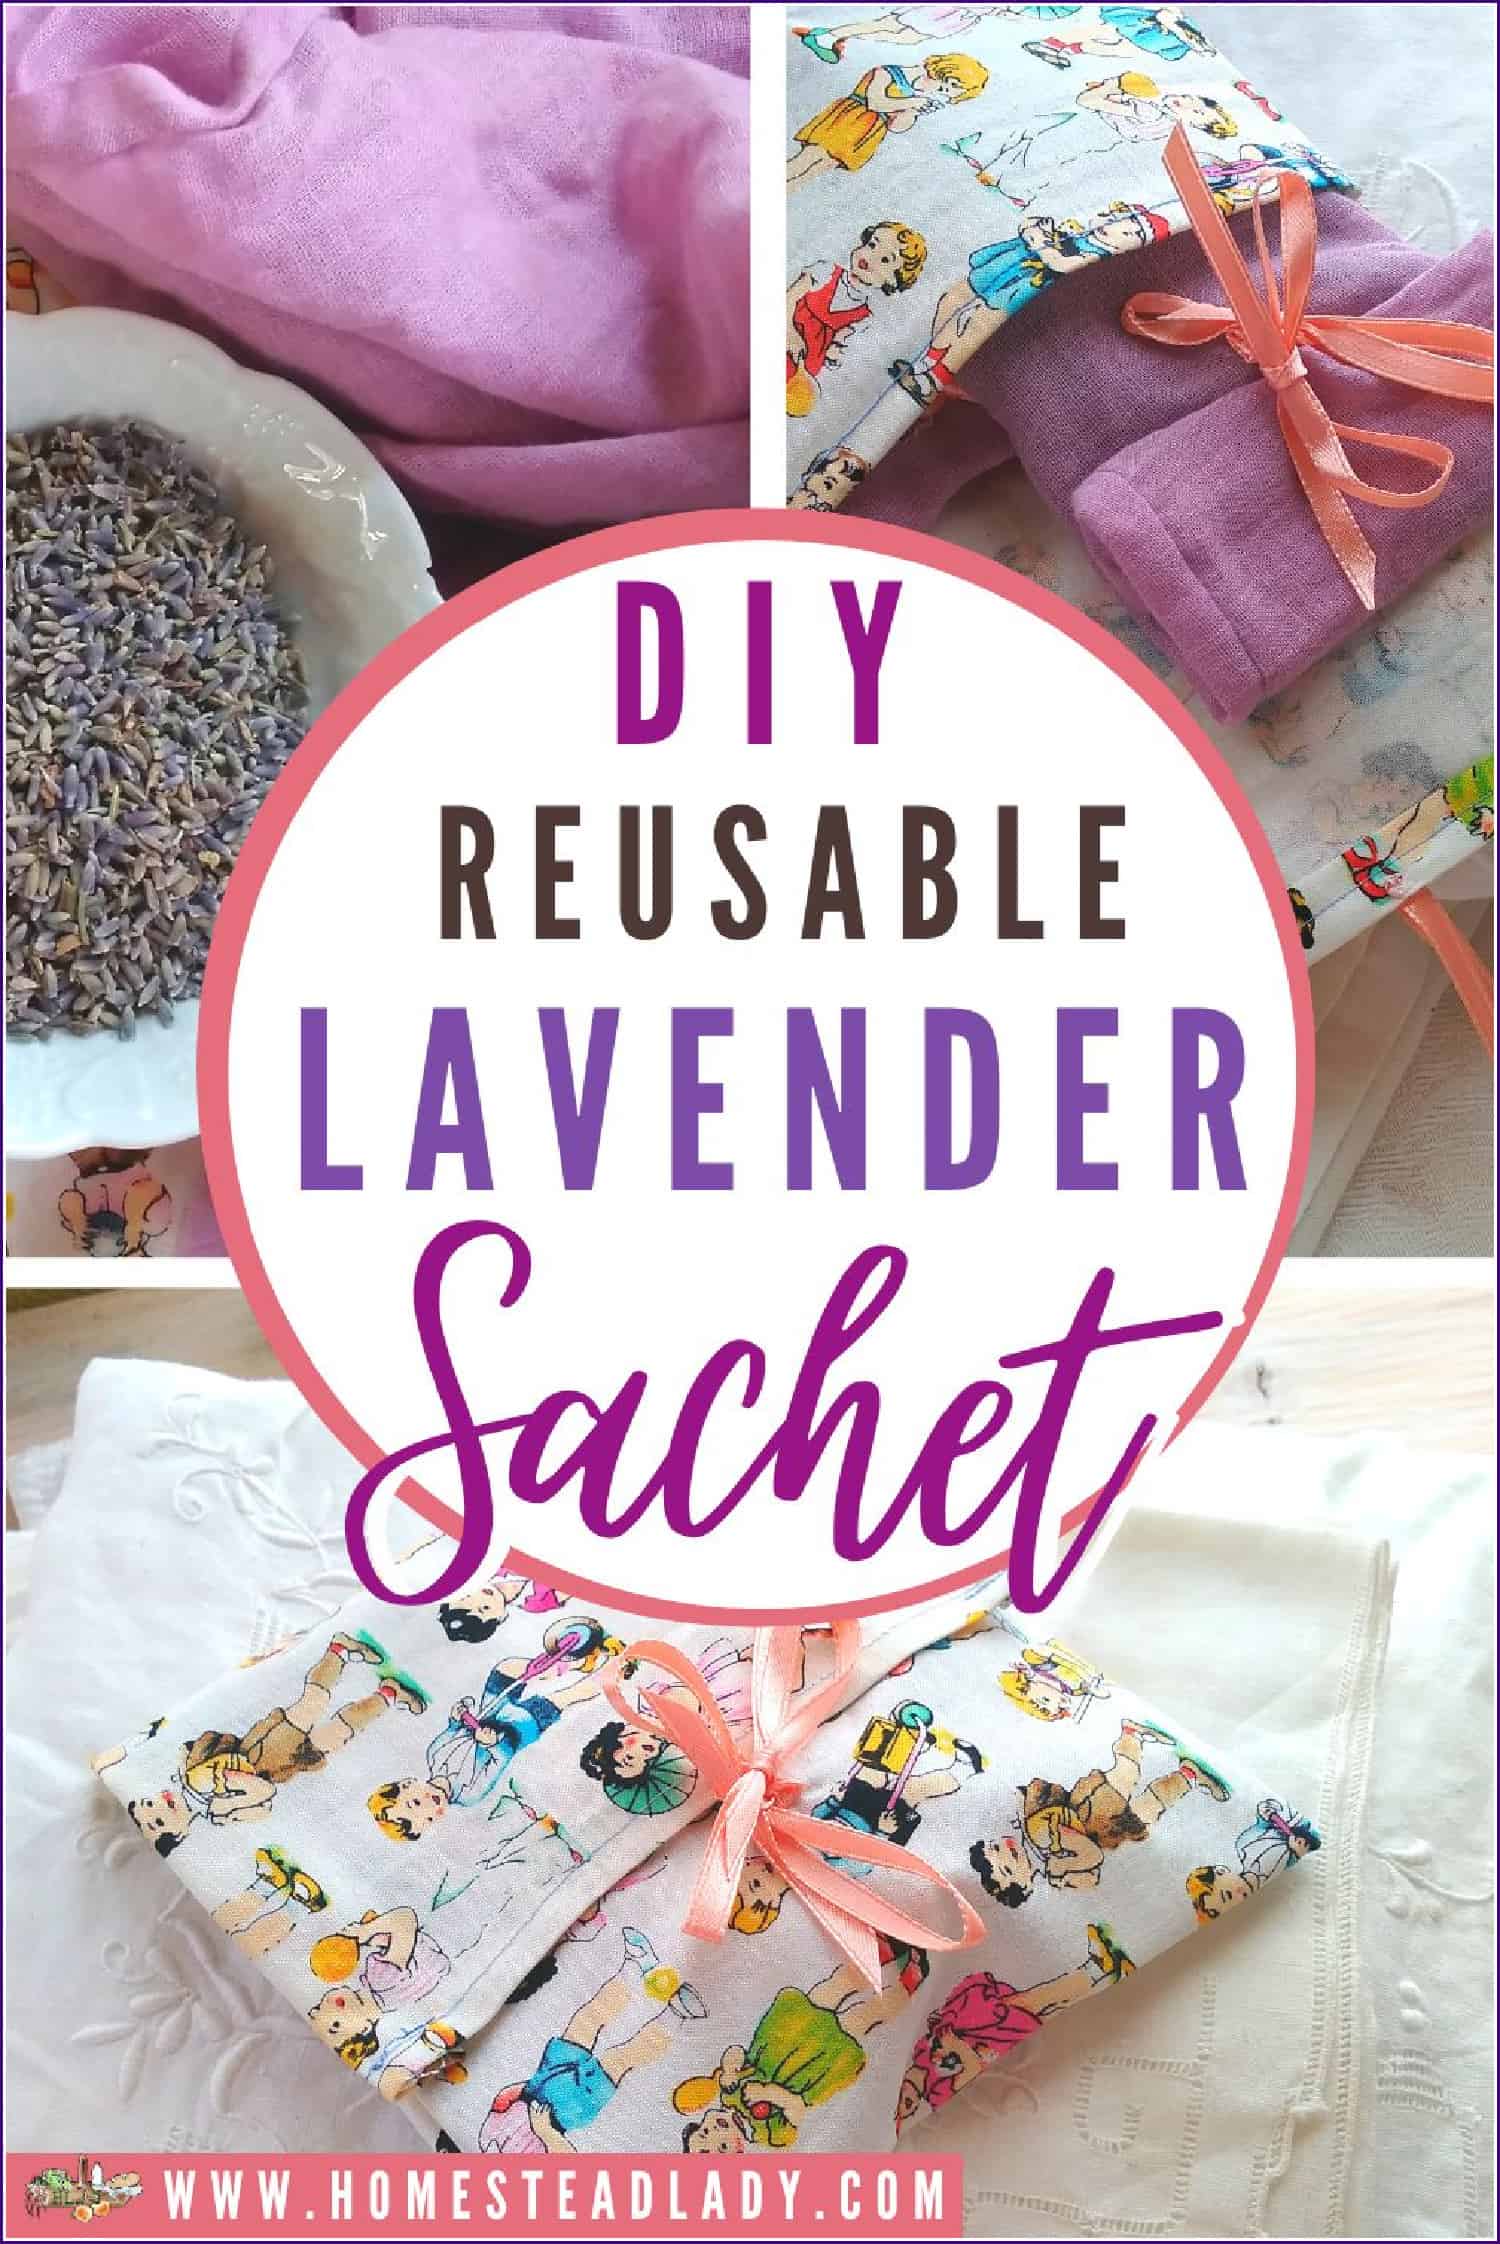
If you need a gift for the holidays, be sure to check out our tutorial on making reusable lavender sachets. Lavender is an absolute favorite of mine; it’s something I have in common with Devon Young, author of The Backyard Herbal Apothecary
You can even use herbs in your wedding flowers! See the lemon balm in this centerpiece?

If you really want to learn more about herbs, I can recommend the online herbal courses at The Herbal Academy. Click below to learn more:

Herb Garden Resources
Visit the following article to learn to plan and plant a wellness herb garden.
Also, here is a list of wellness herbs to consider planting in your herb garden.
We can also recommend several books to get you started with your herb garden plans. Even if you already have an herb garden, you may want to expand it.
- Here’s our review of the Cook’s Herb Garden – click here.
- Also, here’s our review of Herbal Tea Gardens – click here.
- And the Herbal Medicine Maker’s Handbook – click here.
If you have kids, be sure to peruse our article, Herbal Education for Children.
Remember the books also outlined in the articles highlighted in “Harvest Herbs for Use” section.


Wow! Thanks for sharing. You’re inspiring me to plant a bigger herb garden, with more varieties! And I love you’re drying rack!
Great post! We just planted out first herb garden this year and found this very helpful. I was hoping to dry some to use throughout the winter and your tips will help so much! Thanks!
So glad! I love putting away things for the winter – it makes me feel like a very industrious squirrel. 🙂
Thank you for such helpful information! You’ve helped me see herbs in a new light.
I only have 7 herbs growing so far. I thought I’d lost the Calendula as I always had tons and this year nothing. But I see half a dozen flowers poking up amongst the other plants now. Thank heavens! I LOVE them. They are the only herb that stays true to colour in my handmade soap. I’m so glad I found your blog last week 🙂
What an amazing way to learn. I do my best learning when I can have a hands on approach. This year, since we now have crazy free range chickens, I was not able to plant the garden. The mint and chives did happen to survive, however the strawberry’s did not have such luck.
What a sweet baby;)
Ah, free range plant assassins, you mean! 🙂
Fabulous post, thanks for linking up with the Clever Chicks Blog Hop this week!
Kathy Shea Mormino
The Chicken Chick
https://www.The-Chicken-Chick.com
Sweet baby dreaming happily beside the lavender! Thanks so much for sharing with us at Eco-Kids Tuesday! I hope you join us again today! https://likemamalikedaughter.blogspot.com/2013/06/eco-kids-tuesday_25.html
Loen Day! That is awesome. I grow herbs but I’m really bad about harvesting them at the proper time and then preserving them. It seems like all I can keep up with at the moment is the vegetable garden. Thank you for sharing this post at the HomeAcre Hop! We’d love to have you back this morning:
https://blackfoxhomestead.com/uncategorized/the-homeacre-hop-25/
Homeschool herb day is such a good idea! Love it! Thanks for linking up to Wellness Wednesday!
Great information! I love herbs so much! Every year, I seem to grow fewer vegetables and more herbs. Mother nature knows what we need for sure.
So glad it was useful! Herbs are so rewarding to grow and use, to be sure.
Thank you so much for posting this! I have some Rosemary that I’d like to harvest, but had no idea what to do with it beyond that. This is so helpful!
Rosemary is a great herb to preserve! It will dry nicely on the stalks hung upside down with air circulating around it. Try not to crush it as you remove it from the stalks so the leaves will keep as much of their oils as possible.
Wow! Thanks so much for sharing! I grow quite a few herbs but I never take full advantage like I should… this is a great resource!
You’re quite welcome – so glad it was useful!
This is such a helpful article! I will be sure to reference it again in the future.
So glad it was useful! Thanks for stopping by!
There are so many great ideas here! I definitely want to start growing more herbs. Thanks for the inspiration!
You bet – glad it was helpful!
I never really knew there was that much to it. Lots of great information that has opened my eyes… now I want to plant even more herbs!! Thanks for the inspiration!
Well, you can never have too many herbs, I say – go for it!
It saddens me to say this but… we don’t have a ton of herbs. I desperately want an herb garden but just can’t keep up with everything. I’ll definitely be saving this post for the future though!
I certainly sympathize! It might help to think of them as multi-functional plants. So, calendula is a great flower for salves that help with skin irritations like rashes and insect bites (human application). However, it’s also a great pollinator plant (insect application) and host plant for beneficial insects to help in the garden (plant application). Without needing a separate space like a special herb garden, you can simply grow a few calendula plants from seed (which is very straightforward) and plant them with your veggies. No fuss, no muss.
I hope that helps!
What a great article. I am saving this for reference. Thanks for sharing!
So glad it was helpful – have a lovely day!
I love this post. As a budding herbalist, I’m always looking for help. Thanks for the great information and help.
So glad it was helpful – thank you for stopping by!
Great post! I was bitten by the herb bug when I was able to successfully harvest my basil this year! Next year I’m going all out. Thank you!
That’s an excellent goal! Basil is sort of a gateway herb, don’t you think?
This post is so helpful! I love all the tips on how to harvest and use the different herbs. Thanks so much for sharing!
You bet, thanks for stopping by!